QMapShack visualizes maps and tracks
Print and Save
You can use Ctrl+P or the File | Print menu item to activate the print and save function for the displayed map section (Figure 7).
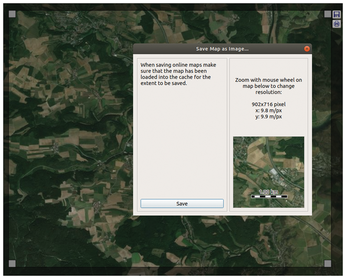
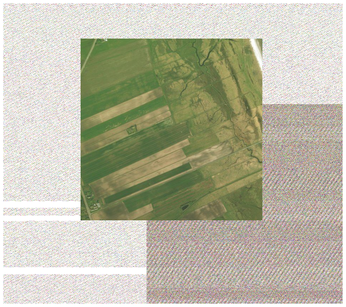
First select the desired map section and use the buttons at the top-right to start saving or printing. This works for the map representations themselves, as well as for aerial photographs and superimposed representations. However, the preview only shows the area you are really editing to a very limited extent. QMapShack shows the real resolution in meters per pixel. When saving, you will get a screenshot (also for aerial photos), but the quality is not convincing (Figure 8).
The actual printing function is even less satisfactory: Despite activated color printing and printing to file, QMapShack only delivered a black-and-white print with a wide margin in the test. In combination with OpenStreetMap and OpenCycleMap, however, both saving and printing worked well.
Tracks and Routes
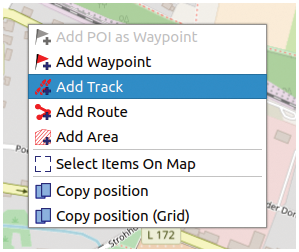
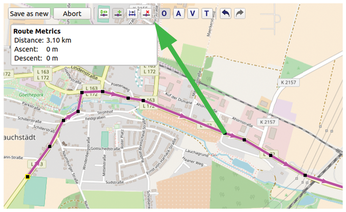
One of the areas of application for QMapShack is convenient planning of routes on the screen. To create a track, right-click in the Map window and select Add Track from the context menu (Figure 9). This step activates "rubber band mode" and creates a targeted line, which you place on the map.
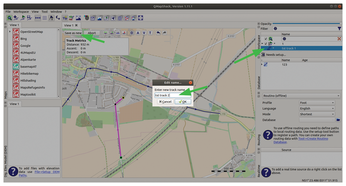
Right-click to exit this mode, and then save the created track to disk as a GPX track using Save as New (Figure 10). Saved tracks automatically appear in the project overview, which QMapShack displays by default at the bottom of the right sidebar.
You can also integrate portals like Waymarkedtrails.org into QMapShack. To do so, press Ctrl+L or select the File | Load GIS data menu item. Among other things, the application supports importing GPX and TCX files; it can also handle the new FIT format used by today's Garmin devices. The corresponding tracks also appear in the project overview. If the track disturbs the map view too much, use the Transparency slider to adjust the display.
You create routes in the same way as tracks – via the context menu. Select the Add route option, put together the route, and save it. Unlike a track, a route can be corrected at any time. You can reactivate the editor mode by selecting the route with the left mouse button and clicking on the Move route points icon (Figure 11).
Routing with Routino
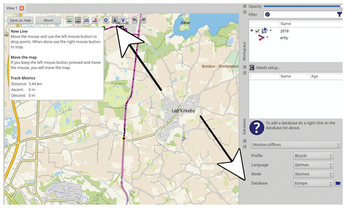
For additional options when planning routes, set up the Routino [3] open source router (see the "Installing Routino" box). The program calculates the connection between two points on the map based on topographical data. However, you need additional data to enable routing on the local computer. Your options will be similar to those provided by online services like Naviki [4] or openrouteservice [5].
Installing Routino
Routino is the (offline) router preferred by QMapShack. The program is available in the package sources of many distributions. In some environments, however, you may need to build the application manually in order to use the latest version. Listing 4 shows the process for Ubuntu.
You load the routing data from the Internet [7]. The corresponding archive contains four files with a total size of more than 5GB, which you unpack into the qmapshack-data/Routino/ directory. Routino also supports PFB files, such as those offered by Geofabrik [8]. Activate routing by selecting the router, profile, and database (Figure 12).
Listing 4
Installing Routino
First, configure Routino by specifying a directory with the routing data. If you are using a Garmin map, you will need to install additional files: Routino cannot use the routing data available in Gmapsupp.img. Store the data in the configuration directory under Routino/. This directory can also be on another data carrier.
To calculate a route, first set the starting point, then activate automatic routing with button A, and then, based on the settings in the router dialog, you will see either the shortest or fastest route to the current position of the mouse pointer. Routino offers only very limited settings – Naviki or openrouteservice usually deliver significantly better results.
« Previous 1 2 3 Next »
Buy this article as PDF
(incl. VAT)
Buy Linux Magazine
US / Canada
UK / Australia