Convert an Android Device to Linux
Linux on a Droid
ByIf you want to install Linux on an Android device, you have several options. We examine some of the possibilities.
Installing a regular Linux distribution on an Android device opens a whole new world of possibilities. You can turn your Android device into a full-blown Linux/Apache/MySQL/PHP server and run web-based applications on it, install and use your favorite Linux tools, and even run a graphical desktop environment. In short, having a Linux distro on an Android device can come in handy in many situations. You can install Linux on an Android device in several ways, and I’ll look at some of the available options.
KBOX: No Root Required
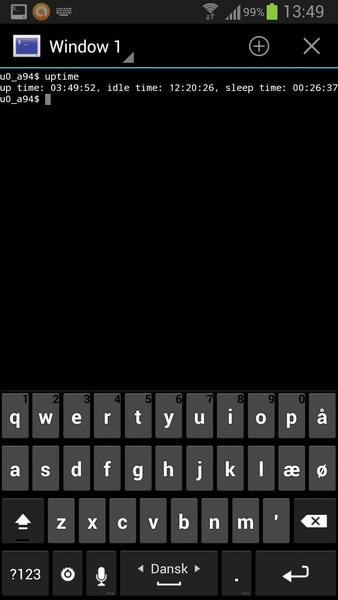
In many cases, installing Linux on Android usually means going through the rigmarole of rooting the Android system with the risk of bricking your Android device. If you don’t find this idea all that appealing, then you might appreciate KBOX. This miniature single-user Linux distribution is integrated directly into a terminal emulator, and it can be installed on non-rooted Android devices (Figure 1).
KBOX is not available in the Google Play Store, so you have to download the APK package from the project’s website and install it manually. By the way, the author of KBOX provides not only the ready-to-use package but also some technical descriptions of KBOX’s inner workings.
KBOX comes with an assortment of BusyBox utilities (find, grep, tar, vi, etc.), an SSH server and client, and the scp tool. A handful of other packages are available as separate downloads, including vim and rsync. Rsync can act both as a client and server. Installing packages on KBOX is done using the dpkg tool. To install, for example, the rsync package, grab it from the project’s website and use the following command:
dpkg -i /sdcard/Download/rsync_3.0.8_kbox.deb
Obviously, KBOX is not a replacement for a full-blown Linux distribution, but it can be useful in certain situations. If you install rsync, for example, you can use this powerful and flexible tool to back up files on your Android device to a remote server, and thanks to the supplied SSH server, you can access your Android device via an SSH connection.
Going the chroot Root: Linux Deploy
Although KBOX offers a straightforward way to install Linux on an Android device, you might find it too limited for your needs. In this case, you should consider installing a regular Linux distribution, but to do this, you must root your Android device first. The exact rooting procedure depends on your particular Android device, and it can be tricky at times. However, plenty of rooting guides are available online to help you along the way.
When it comes to installing Linux on a rooted Android device, one option is Linux Deploy. This open source app offers an easy way to install and run a supported Linux distribution in a chroot environment, which is basically a special directory that acts as a temporary root directory. Because the root directory is the top of the filesystem hierarchy, applications running in the chroot environment don’t access directories higher up than the root directory. In other words, chroot creates an isolated environment that doesn’t interfere with the rest of the system. The good news is that Linux Deploy hides all the gory technical details behind a user-friendly interface, so you don’t need to know all the nitty-gritty to be able to install and run Linux on your rooted Android device.
Before you proceed with installing Linux on Android using Linux Deploy, you need to install two additional apps on your device: a terminal emulator and a VNC client. Although several terminal emulator and VNC client apps are available in the Google Play Store, you can’t go wrong with VX ConnectBot and MultiVNC. Both are capable open source apps available free of charge.
To install one of the supported Linux distributions using Linux Deploy, launch the app, and tap the Properties button. The Properties window contains a list of configurable options. Start by choosing the desired Linux distribution from the Distribution list in the Deploy section. Linux Deploy supports many popular distros, including Debian, Ubuntu, Arch Linux, Fedora, and openSUSE. For certain distributions, you can also select a specific version. Choose Debian, for example, and you can pick the desired version (stable, testing, unstable, etc.) in the Distribution suite list.
By default, Linux Deploy uses a mirror based in Russia, but you can specify a mirror closer to you by editing the Mirror URL setting. If you are installing Debian, you can find a list of mirrors online. Pick the mirror closest to you and enter its URL as follows:
http://ftp.de.debian.org/debian
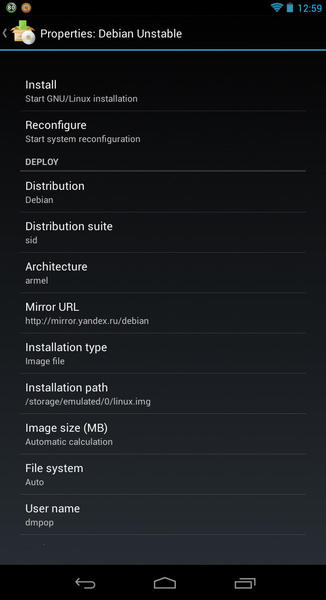
Linux Deploy can install Linux into an image file, a specific folder, or a separate partition, and you can choose the desired option in the Installation type list. In most cases, installing Linux as a single image file makes most sense, especially on devices that don’t support additional storage. If your Android device has an SD card slot, you can install Linux on a storage card or use just a partition on the card for that purpose.
You can choose the desired installation option from the Installation type list (Figure 2). If needed, you can also use the appropriate options to change the default installation path, specify the desired image size, choose the filesystem, and change the default android username.
Linux Deploy lets you install a graphical desktop environment, too, and the app supports several popular graphical desktops, including LXDE, Xfce, Gnome, and KDE. To install a desktop environment, pick the desired desktop from the Desktop environment list and enable the Install GUI option.
The next stop is the Startup section. To start, make sure the SSH option is enabled; otherwise, you won’t be able to connect to the running Linux instance. If you chose to install a graphical desktop environment, you will have to enable the VNC option as well, so you can connect to the desktop using a VNC client app. Next, scroll down to the VNC section and configure the VNC settings, such as color depth and resolution as well as desktop dimensions.
Once you’re done tweaking settings and specifying options, you can tap the Install item and wait until Linux Deploy finishes the installation (Figure 3).
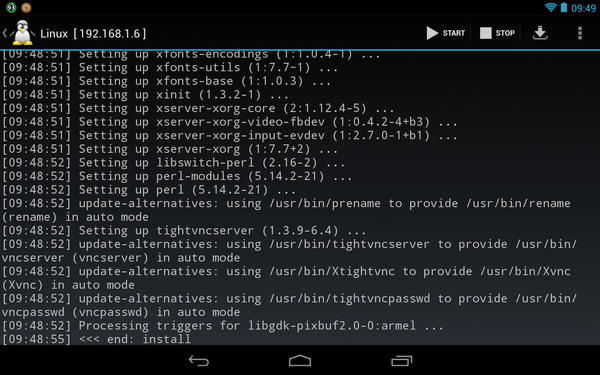
When the installation operation is completed, you should see the following status message:
<<< end: install
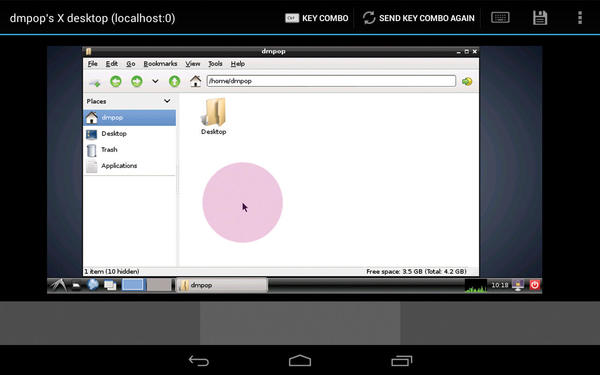
Then, tap the Start button to boot the installed Linux distro. Note the IP address of the running Linux instance and launch the terminal emulator app (Figure 4).
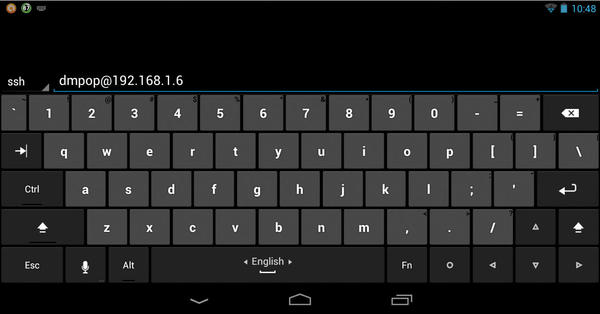
Establish an SSH connection to the running Linux instance using its IP address and the default android username (or the username you specified in the Properties window). When prompted, enter the default changeme password.
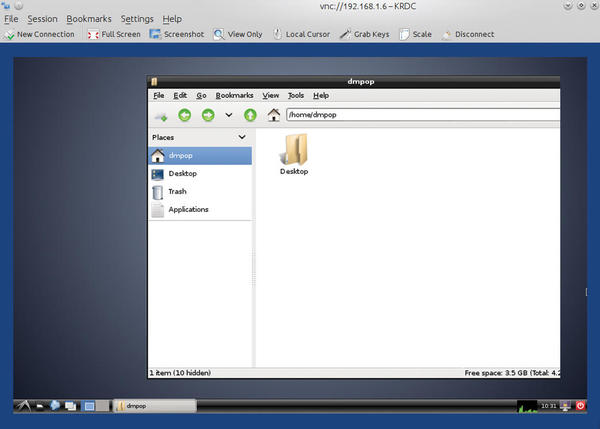
The first thing you might want to do is change the default passwords. Issue the passwd command to change the user password and run sudo passwd root to assign root password. Accessing the graphical desktop environment is equally easy: Launch the VNC client app and connect to the running VNC server using the default changeme password (Figures 5 and 6).
Limbo PC Emulator
Limbo PC Emulator provides yet another way to run Linux on an Android device. This little app is a port of the popular Qemu emulator, and it allows you to run a handful of lightweight Linux distributions. Before you give Limbo a try, be aware that it’s not particularly fast. This is not a big surprise, considering that it emulates the x86 architecture on the ARM-based platform. Limbo’s sluggishness is one of the reasons why you should use it with a nimble Linux distribution like Damn Small Linux and Debian sans a graphical desktop environment. On the positive side, running Linux inside Limbo PC Emulator doesn’t require rooting, and the app is very straightforward to use.
Start by downloading the ISO image or the HDD file of the desired Linux distro. You can find the list of supported distros and links to ISO images and HDD files on the project’s website. Launch the Limbo app on the Android device, choose New from the Load VM drop-down list, and give the new virtual machine (VM) a name (Figure 7).
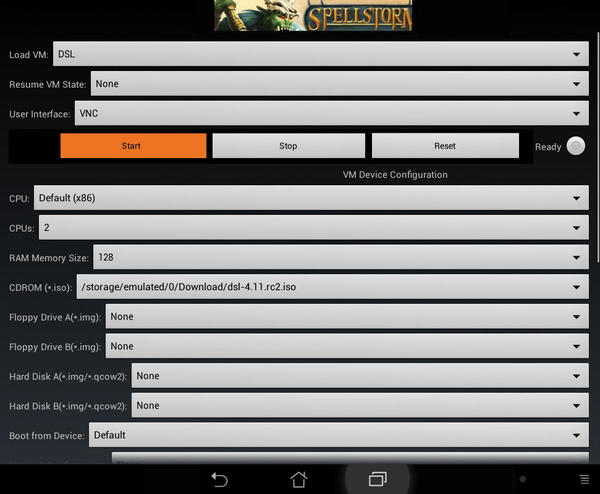
Assuming you want to boot the VM from an ISO image, you can use the CDROM option to select the downloaded .iso file. Use the Hard Disk A option to create an empty hard disk image for use with the VM. Then, select User from the Network Configuration drop-down list to enable networking in the NAT mode. Finally, you can enable the External VNC option if you want to access the graphical desktop from a remote machine via VNC. Next, tap the Start button to launch the created VM.
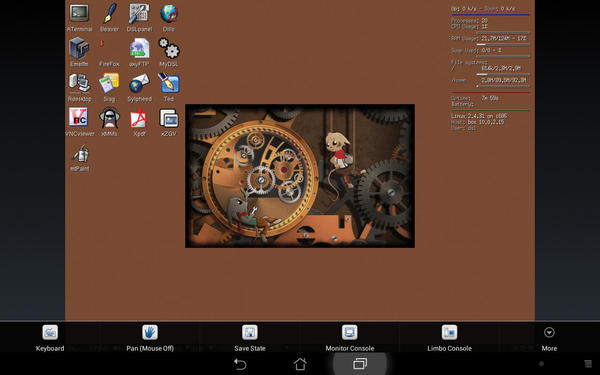
Although Limbo is relatively slow, the app has two features that can improve the emulator’s performance. Enabling the High Priority option can speed up the VM, but it can also make the Android device less responsive. A feature that lets you save the VM state won’t directly improve the performance, but it can help to avoid lengthy boot sequences by saving the VM in its current state. Note that this feature requires a hard disk file. Additionally, the project’s website offers a few tips on improving the performance of specific distros. For example, you can use the following boot parameters:
boot> dsl toram noacpi noapm noscsi dma
to speed up Damn Small Linux (Figure 8).
Final Word
The apps I’ve described are not your only options for running Linux on an Android device. The Complete Linux Installer and Linux Installer apps, for example, let you install a Linux distribution on a rooted Android device. If you own a Google Nexus 7 device, you can replace Android with Ubuntu by following the instructions on the Ubuntu wiki. The described solutions have their advantages and drawbacks, but because they are all available free of charge, you can try them all and pick the one that best fits your needs.
The Author
Dmitri Popov has been writing exclusively about Linux and open source software for many years, and his articles have appeared in Danish, British, US, German, Spanish, and Russian magazines and websites. Dmitri is an amateur photographer, and he writes about open source photography tools on his Scribbles and Snaps blog at scribblesandsnaps.com.