Recording desktop activity
scrot
Scrot is a command-line screen capture program. It requires a minimum of a target file, which can be in most standard graphic formats, including .png, .jpeg, and .tiff. It does not include .gif, most likely because of the boycott of the format that once existed.
The command includes several options for setting up the screen capture. By default, scrot captures the entire screen, but you can use -s or --select, then press Enter to select an area on the screen. Similarly, -u -r --focused selects the currently active window to capture.
You can set a delay before the shot is taken with -d SECONDS or --delay SECONDS, in case you have to set up something such as the active window, perhaps accompanying it with -c or --count SECONDS to provide a countdown to the moment of the shot (Figure 3). If you have multiple monitors, then using -m or --multidisp captures all of them in the single shot.

Other options can control output; for example, you can use -b or --border to capture the window decorations and -t PERCENTAGE or --thumb PERCENTAGE to create a thumbnail shot. If you know that you will be editing or using the screen capture immediately, still another option is to use -e or --exec APPLICATION to open it in the application immediately after it is created, thereby streamlining your work flow by eliminating one step.
By default, scrot saves to a file with the naming format YYYY-MM-DD-HH-MM-SS_width_height_scrot.png. This name can be modified with special strings placed immediately after the basic command or immediately before the file name (Table 1). These special strings do not modify file name characteristics but extract them from the file, thus allowing you to see file characteristics without opening the file in a graphics editor. Note that the first three options only work when placed directly after the basic command.
Table 1
Special Strings for scrot File Names
| String | Characteristic |
|---|---|
| $f |
Image path/file name |
| $n |
Image name |
| $s |
Image size (bytes) |
| $p |
Image pixel size |
| $w |
Image width |
| $h |
Image height |
| $t |
Image format |
cnee
The cnee tool records and replays activity in an X Window session – showing not so much events as they appear on the desktop but rather the technical details behind what is displayed. This orientation makes cnee ideal for automated testing.
In both recording and replaying, cnee can display across multiple monitors. By default, its output is saved to ./standard output – in other words, to the terminal, However, you may want to specify an output file instead with -f or --file FILE.
To begin recording with cnee, add the option --record or -rec after the basic command. You need to specify --mouse and --keyboard if you want to include their actions in the recording (Figure 4). If necessary, you can add -t or --time SECONDS to delay the start of the recording and save file space. To save even more space, use --first-last to record only the start and finish of each event. Another choice is to set the number of events to record with -etr or --events-to-record NUMBER or the time to record with -str or --seconds-to-record SECONDS.

You probably will not need any further options, but --speed-percent PERCENT sets the speed of playback and --replay-resolution RESOLUTION the resolution for playback.
recordMyDesktop
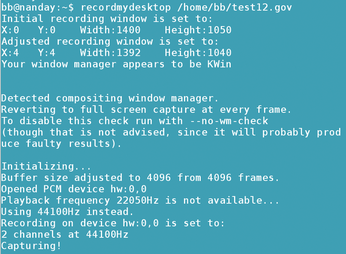
The recordmydesktop tool captures all activity on the desktop and stores the result for playback in an Ogg-Theora-Vorbis file (Figure 5). By default, this file is ./out.gov, but you can substitute another file name, so long as it has the proper extension.
At its simplest, recordMyDesktop requires only the basic command to start recording, and Ctrl+C to stop recording and save the file. However, in addition to the file name, you can fine-tune much of the recording.
To start, you set recordMyDesktop to record only events on part of the desktop. With the -x PIXELS and -y PIXELS options, you can define a region by its offset from the upper left corner, and with -width PIXELS and -y PIXELS, you can set the size of the region recorded. However, getting the exact positioning you want with these options will generally involve trial and error. Still, by combining these options with --follow-mouse, you can reduce the commands you need significantly.
Getting more complicated, you can also use -fps NUMBER to set the frame rate, with the higher number making the smoother recording. The number of sound channels is set with --channels NUMBER and the sound frequency with --freq NUMBER. If you want to add narration, --use-jack PORT will make recordMyDesktop aware of input from a microphone. Or, if such options seem too complicated, --no-sound can greatly eliminate many problem sources.
In much the same way, you can adjust the encoding of the recording with --on-the-fly-encoding, --v_quality NUMBER (0-63), or --v_bitrate NUMBER (45,000-2,000,000). However, if none of these options are meaningful for you, the more generalized option s_quality NUMBER (1-10) may be a surer alternative.
recordMyDesktop has no jurisdiction over playback, but it has no need to. Make a note of the file where its output is stored, and you can play it simply by running the file from the command line.
« Previous 1 2 3 Next »
Buy this article as PDF
(incl. VAT)
Buy Linux Magazine
US / Canada
UK / Australia
Subscribe to our Linux Newsletters
Find Linux and Open Source Jobs
Subscribe to our ADMIN Newsletters
Support Our Work
Linux Magazine content is made possible with support from readers like you. Please consider contributing when you’ve found an article to be beneficial.

News
-
TUXEDO Computers Unveils Linux Laptop Featuring AMD Ryzen CPU
This latest release is the first laptop to include the new CPU from Ryzen and Linux preinstalled.
-
XZ Gets the All-Clear
The back door xz vulnerability has been officially reverted for Fedora 40 and versions 38 and 39 were never affected.
-
Canonical Collaborates with Qualcomm on New Venture
This new joint effort is geared toward bringing Ubuntu and Ubuntu Core to Qualcomm-powered devices.
-
Kodi 21.0 Open-Source Entertainment Hub Released
After a year of development, the award-winning Kodi cross-platform, media center software is now available with many new additions and improvements.
-
Linux Usage Increases in Two Key Areas
If market share is your thing, you'll be happy to know that Linux is on the rise in two areas that, if they keep climbing, could have serious meaning for Linux's future.
-
Vulnerability Discovered in xz Libraries
An urgent alert for Fedora 40 has been posted and users should pay attention.
-
Canonical Bumps LTS Support to 12 years
If you're worried that your Ubuntu LTS release won't be supported long enough to last, Canonical has a surprise for you in the form of 12 years of security coverage.
-
Fedora 40 Beta Released Soon
With the official release of Fedora 40 coming in April, it's almost time to download the beta and see what's new.
-
New Pentesting Distribution to Compete with Kali Linux
SnoopGod is now available for your testing needs
-
Juno Computers Launches Another Linux Laptop
If you're looking for a powerhouse laptop that runs Ubuntu, the Juno Computers Neptune 17 v6 should be on your radar.