Automate data backup at the command line
Restore
To restore backed-up files from the archives, you don't need to invoke rdiff-backup again: If you need to restore your data collection from the current archive, you can simply copy the data from the backup directory. The Linux cp command helps you do this; you need to specify the archive option. The easiest form is:
cp -a /<Backup-Directory>/<File-Name> /<Restore-Directory>/<File-Name>
To access old backup files, the software offers two options: You can either access the incremental files from the rdiff-backup program, or you can use rdiff-backup-fs, which must be installed separately as an external package, to mount the backup archive as a conventional filesystem.
The rdiff-backup-fs [9] package (the name can differ among distros) is maintained in some software repositories of major Linux distributions, but it can also be picked up from the project website. For direct access, use the -r parameter (short for "restore as-of") followed by a date. For example, you need the following command sequence to restore a 10-day-old backup from a server to a local directory on a client:
rdiff-backup -r 10D <Server-Name>::/<Source-Directory>/<Restore-Directory>
The detailed documentation [10] lists various application scenarios that makes the somewhat unusual nomenclature understandable.
rsnapshot
As the name suggests, rsnapshot is a tool for creating complete snapshots of a filesystem [11]. It can create both local snapshots and use SSH to create snapshots of remote systems. The Rsync tool creates backups in which hard links replace unchanged files. Rsnapshot actually only writes modified data in the backup. The cron daemon regularly initiates the backup. Manual backup runs are not intended. The software takes all its information from a configuration file.
Because rsnapshot works with hard links, the backups always have to end up on the same filesystem. Otherwise, the tool would have to create a space-consuming full backup. Therefore, rsnapshot is more suited to servers on small networks or to local workstations than to extensive storage setups. However, the tool, which is written in Perl, only stores a configurable number of backups, so the storage space remains manageable, even with short backup intervals.
Configuration
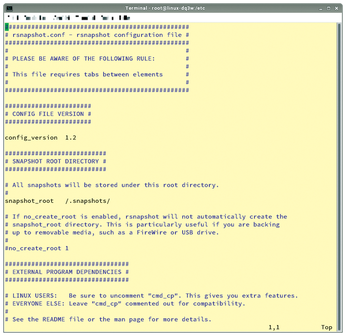
After the installation, you need to configure the program, which is available from the repositories of practically all major Linux distributions. To do this, call the /etc/rsnapshot.conf file, which can be edited easily with any standard text editor.
Because the numerous options are easily accessible, thanks to detailed comments, the configuration does not pose unsolvable problems, even for inexperienced users. Note that the different options need to be separated by tabs. Also, path specifications must always end with a slash.
The configuration file not only lets you specify the source and target directories and list included or excluded files, it also contains a schedule for a backup plan. Moreover, settings can be defined to back up a remote server via SSH or handle an LVM network. Settings for the snapshot retention period (Figure 9) are also important.
The configuration file is quite extensive, so you can validate it after a modification. To do this, enter the rsnapshot configtest command at the prompt with administrative privileges. The Syntax OK output signals a consistent configuration. A cron or anacron job then launches the software automatically. A predefined sample configuration is available in the /etc/cron.d/rsnapshot file on some distributions, and its data can be adapted to suit your individual needs. A FAQ [12] provides more information.
Buy this article as PDF
(incl. VAT)
Buy Linux Magazine
US / Canada
UK / Australia
Subscribe to our Linux Newsletters
Find Linux and Open Source Jobs
Subscribe to our ADMIN Newsletters
Support Our Work
Linux Magazine content is made possible with support from readers like you. Please consider contributing when you’ve found an article to be beneficial.

News
-
TUXEDO Computers Unveils Linux Laptop Featuring AMD Ryzen CPU
This latest release is the first laptop to include the new CPU from Ryzen and Linux preinstalled.
-
XZ Gets the All-Clear
The back door xz vulnerability has been officially reverted for Fedora 40 and versions 38 and 39 were never affected.
-
Canonical Collaborates with Qualcomm on New Venture
This new joint effort is geared toward bringing Ubuntu and Ubuntu Core to Qualcomm-powered devices.
-
Kodi 21.0 Open-Source Entertainment Hub Released
After a year of development, the award-winning Kodi cross-platform, media center software is now available with many new additions and improvements.
-
Linux Usage Increases in Two Key Areas
If market share is your thing, you'll be happy to know that Linux is on the rise in two areas that, if they keep climbing, could have serious meaning for Linux's future.
-
Vulnerability Discovered in xz Libraries
An urgent alert for Fedora 40 has been posted and users should pay attention.
-
Canonical Bumps LTS Support to 12 years
If you're worried that your Ubuntu LTS release won't be supported long enough to last, Canonical has a surprise for you in the form of 12 years of security coverage.
-
Fedora 40 Beta Released Soon
With the official release of Fedora 40 coming in April, it's almost time to download the beta and see what's new.
-
New Pentesting Distribution to Compete with Kali Linux
SnoopGod is now available for your testing needs
-
Juno Computers Launches Another Linux Laptop
If you're looking for a powerhouse laptop that runs Ubuntu, the Juno Computers Neptune 17 v6 should be on your radar.