An Amiga emulator for the Raspberry Pi 400
Mimic

© Lead Image © Lightwise, 123rf.com
Convert a Raspberry Pi 400 into a retro computer that behaves like the popular Amiga 500.
The Commodore Amiga was more than a gaming platform; its graphical interface, Workbench, was way ahead of its time. The Amiga models [1] rank among the particularly popular home computers of the 1980s and 1990s. The A500, A1200, and several other Amigas had the motherboard and a floppy drive integrated into the keyboard case. More professional variants like the A3000 were built more like a PC and housed the mainboard, expansion cards, and drives in a desktop or tower case.
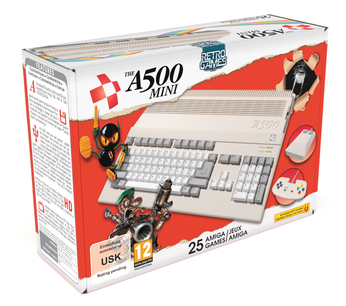
According to Wikipedia [1], the Amiga 500 is the best-selling model, which is what prompted Retro Games Ltd. to launch a replica to be released in March 2022, dubbed the A500 Mini (Figure 1) [2]. The manufacturer is already known for reissues of other Commodore computers, such as the C64 (in miniature format and full size with a working keyboard) and VC20 (full size only).
For a good Amiga emulation, you don't have to wait for the A500 Mini. Emulators are available for practically all platforms (even for the old MS-DOS) that bring that Amiga feel to other hardware with varying levels of setup overhead. In the Raspberry Pi world, the Pi 400 is a very good choice for use as an Amiga emulator because, like the original keyboard Amigas, it combines a keyboard, mainboard, and storage device in a single housing.
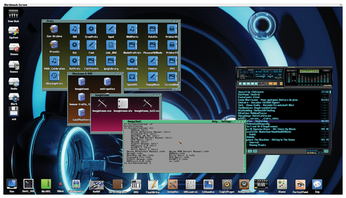
The developers of the PiMiga [3] had the same thought, prompting them to build a Raspberry Pi OS distribution that boots directly into the Amiberry emulator [4]. A Pi 400 with the PiMiga card in place needs 35 seconds after powering on for the Amiga Workbench interface to appear in high resolution (1920x1080) (Figure 2). The current (at press time) PiMiga v1.5 uses Raspberry Pi OS 10 with kernel 5.10.17.
Installation
PiMiga is available as a torrent file, which you can source directly from the provider [3], in the small or large variant. For PiMiga 1.5 Lite, download the pimiga15Lite.img archive; the archive for PiMiga 1.5MF is pimiga15MF.7z, which weighs in at 42GB and gives you the 77GB pimiga1.5MF.img image file.
It may take some time to download the archive, unpack it, and write the image file to a sufficiently large microSD card (32GB or 128GB).
To boot the emulated Amiga, you need a BIOS, or Kickstart ROM in Amiga-speak. Different versions of these ROMs are available for various Amiga computers. For the Amiga 1200, PiMiga needs Kickstart 3.1.
The developer sets great store by users sticking to the correct procedure; both images come without the required Amiga Kickstart ROMs, which you have to source elsewhere. This process is completely legal because all rights to the Commodore and Amiga products up to 1993 have been transferred to Cloanto [5], and the company still distributes software packages containing the ROMs [6].
The "Kickstart ROMs" box provides tips on how to buy a suitable package from the Cloanto store and where to find the correct ROMs therein. Of most importance is that you have Kickstart v3.1 for the Amiga 1200 (kick31a1200.rom) in the KICK partition on the microSD card. If you use an encrypted version of this ROM (from the Cloanto packages), the rom.key file must be in the same location.
Kickstart ROMs
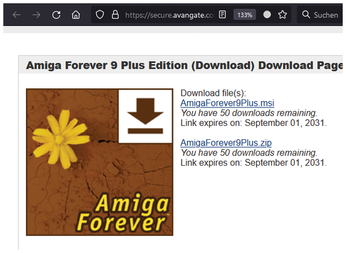
If you own an Amiga, you can use the original ROM; otherwise, you have to get it some other way. One good option is to buy the Amiga Forever Plus Edition [7] for just under $30 (EUR30). Manufacturer Cloanto is the current rights holder of all Kickstart versions and sells them, among other things, as part of this package. After you confirm payment, you can download directly from the store page, which gives you either an MSI installer (for Windows) or a ZIP archive (Figure 3).
Unpack the AmigaForever9Plus.zip archive after completing the download and mount the ISO image af-dvd.iso. Mount the image with a variant of the command:
mount -o loop af-dvd.iso /mnt/
The Kickstart ROMs are now in the Amiga Files/Shared/rom/ folder. You need two files for PiMiga: the encrypted Kickstart ROM amiga-os-310-a1200.rom and the key file rom.key.
Amiga Forever Essentials for Android [8] is far cheaper ($1.99); but it is only useful if you own an Android smartphone. There is no iOS version. Transferring the file involves a bit of work. The app shows the directory with the ROMs (/storage/emulated/0/Android/data/com.cloanto.amigaforever.essentials/files). The filenames of the two required files are identical.
Copy the two files to the KICK partition on the SD card and overwrite the existing rom.key file. Also rename amiga-os-310-a1200.rom at this location to kick31a1200.rom.
Table 1 lists successfully tested ROMs and their MD5 checksums. PiMiga may also be able to handle ROMs from older versions of the Amiga Forever packages. With a little luck, you might find software collections like Amiga ClassiX 4 or Retro ClassiX, as well, which also contain the ROMs. The purchase price of some of the older DVDs can be less than $10.
Table 1
Kickstart ROMs
| License | Source File | MD5 Checksum |
|---|---|---|
| Amiga Forever 9 Plus |
amiga-os-310-a1200.rom |
43efffafb382528355bb4cdde9fa9ce7 |
|
|
rom.key |
69f3435483bbf39f686d9168bff37f2f |
| Amiga Forever Android |
amiga-os-310-a1200.rom |
c9abf2dfd16594d7839924e5f8aea32e |
|
|
rom.key |
68a7d3d66af496ec1d896128b005e9ab |
The PiMiga image has been prepped in a smart way. Most of the data is on an ext4 partition on the SD card. However, in addition to the usual FAT partition, which contains the KICK bootloader, another FAT partition is present, which means you can copy the missing ROMs to the card from any operating system, even if it doesn't understand the ext4 filesystem.
Retro Gaming
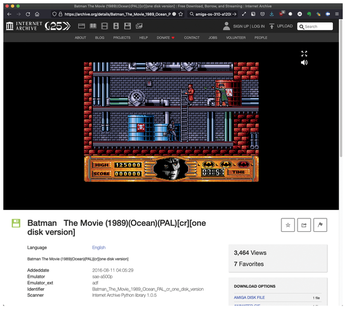
PiMiga does not come with the Kickstart ROMs; however, what you will find in the images are several thousand games that were often sold at the height of the Amiga boom in pretty game boxes in stores. The community considers these abandonware [9], and numerous websites offer them for download. In the Internet Archive [10], you can play more than 10,000 Amiga games right in your browser (Figure 4) from the Software Library: Amiga page.
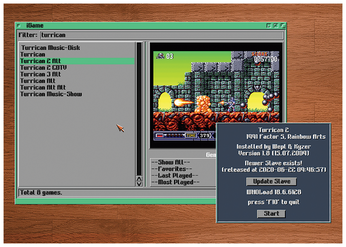
PiMiga relies on WHDLoad [11] and its iGame front end, which you can run by double-clicking the iGame icon at the bottom of the screen. In this program, you can scroll through the entire list of installed games, but it makes more sense to enter a search term in the top bar; then, iGame only shows you the far shorter list of matches.
Many games have a preview image (Figure 5), and double-clicking lets you open the WHDLoad start dialog for that game. When you get there, you can enable cheats (e.g., infinite lives or invulnerability) before you start the game with a click on Start – other games start directly after a short delay.
Regardless of the mechanisms provided in the game, it is usually possible to press F10 to quit the game currently running. You are also told this in the WHDLoad dialog, which you see directly before the game starts. However, if the virtual Amiga crashes, this key does not work: You need to press the keyboard shortcut Ctrl+Fn+Raspberry key+Left arrow to restart the emulator.
Joystick Setup
Before you start your first game, you will want to connect and set up a joystick or gamepad. To begin, press F12 to enter the Amiberry configuration. (On the Raspberry Pi 400 keyboard, F12 is Fn+F2.) Click Input on the left and then select the device on Port 1 in the drop-down menu. Directly below, you can then change the drop-down from Default to Joystick or Gamepad (Figure 6).

Switch to Configurations on the left and click Save to save your changes. When you return to the desktop with Resume, the joystick should work in all games.
Buy this article as PDF
(incl. VAT)
Buy Linux Magazine
US / Canada
UK / Australia
Subscribe to our Linux Newsletters
Find Linux and Open Source Jobs
Subscribe to our ADMIN Newsletters
Support Our Work
Linux Magazine content is made possible with support from readers like you. Please consider contributing when you’ve found an article to be beneficial.

News
-
TUXEDO Computers Unveils Linux Laptop Featuring AMD Ryzen CPU
This latest release is the first laptop to include the new CPU from Ryzen and Linux preinstalled.
-
XZ Gets the All-Clear
The back door xz vulnerability has been officially reverted for Fedora 40 and versions 38 and 39 were never affected.
-
Canonical Collaborates with Qualcomm on New Venture
This new joint effort is geared toward bringing Ubuntu and Ubuntu Core to Qualcomm-powered devices.
-
Kodi 21.0 Open-Source Entertainment Hub Released
After a year of development, the award-winning Kodi cross-platform, media center software is now available with many new additions and improvements.
-
Linux Usage Increases in Two Key Areas
If market share is your thing, you'll be happy to know that Linux is on the rise in two areas that, if they keep climbing, could have serious meaning for Linux's future.
-
Vulnerability Discovered in xz Libraries
An urgent alert for Fedora 40 has been posted and users should pay attention.
-
Canonical Bumps LTS Support to 12 years
If you're worried that your Ubuntu LTS release won't be supported long enough to last, Canonical has a surprise for you in the form of 12 years of security coverage.
-
Fedora 40 Beta Released Soon
With the official release of Fedora 40 coming in April, it's almost time to download the beta and see what's new.
-
New Pentesting Distribution to Compete with Kali Linux
SnoopGod is now available for your testing needs
-
Juno Computers Launches Another Linux Laptop
If you're looking for a powerhouse laptop that runs Ubuntu, the Juno Computers Neptune 17 v6 should be on your radar.