Picasa 2.7 image manager
Memory Management
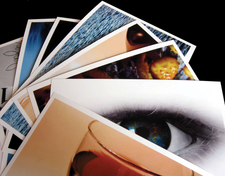
In the age of the digital camera, users are overwhelmed by a flood of images. Picasa not only helps you manage photos but also will enhance the image quality with just a couple of mouse clicks.
Since digital cameras made it easy for users to shoot as many photos as they like without spending a fortune on processing and printing, many photographers have made excessive use of this option. The result is an enormous, jumbled collection of photos on home PCs. Google's Picasa [1] manages photos and also supports easy image editing.
Various add-on functions give users the ability to upload photos to web albums or photo labs and to create incremental image backups. With the press of a button, Picasa will create collages and contact prints or export selected photos or folders as HTML pages for uploading to the Internet.
As of this writing, Google does not offer a native Linux port of Picasa. Fortunately, the installer includes a customized Wine environment to ensure trouble-free launching of the program on Linux (Figure 1). I tested version 2.7 of the software.
Install and Configure
To install Picasa, download the RPM or DEB format package that matches your distribution [2] and install it. Alternatively, you can add the Google repository as a source in your package manager [3] and then use the package manager to install the software. The basic settings for the program are located below Tools | Options…. Also, this is where you set the locale (the system setting is used by default) and the file types you want to index, such as PNG or RAW. The General tab has a Save imported images in option, so you can tell the program where to store your images.
After doing so, specify the directories in which the program is allowed to search for image files by opening the Folder Manager (Figure 2) by selecting the item in the Tools menu. Then click a directory and set the options on the right-hand side to decide whether Picasa should scan once, always, or not at all. In the latter case, the program will automatically add new images to the archive.
To copy images from your digital camera to your computer, click the Import button in the top left-hand side of the main window. After selecting the import source, Picasa copies the files to the import folder you defined previously. The program automatically identifies existing images and will not re-import by default. If you want to change this behavior, uncheck the Avoid duplicates box.
Picasa uses three categories: Collections, Folders, and Albums. A Collection is a containment category that can include both Albums and Folders. To define a password for a collection, right-click the collection and select Add/Change Password… from the menu.
In Picasa, a Folder is a physical directory on your computer, whereas an Album is a virtual directory that can contain images from any directory. This gives users the ability to use dates as folder names, while at the same time organizing photos in albums by subject matter.
On the left-hand side of the main window, the program lists the scanned photos in order by date in the Library. Clicking the third icon from the left, next to Library, switches to a tree view. The tree shows how the directories are physically organized on your hard disk. Clicking a directory opens a thumbnail preview of the image files in the right-hand panel.
To change the description for a folder or album, left-click the entry and select Change description… in the drop-down menu. In the dialog, you can enter the date and time you shot the photo and some additional information. Picasa lets you assign keywords to multiple images at the same time. To start, select the images by holding down the Ctrl key and clicking. Then open View | Keywords and enter the required keywords.
To add captions to images, double-click the photo in question to open the photo for editing. Then click on the gray bar below the image and enter the caption. Picasa indexes the image, just like keywords and folder descriptions, with its internal search engine.
For a normal search, you can simply enter a term in the input box. Matches appear while you are typing. Hidden away below Tools | Miscellaneous | Search for…, Picasa lets users search for images with a predominant color. For example, selecting Blue takes you to photos in which blue is the predominant color (Figure 3). It is easier to search for colors by entering color:"colorvalue". The color values you can enter include red, green, blue, white, and black.
The iso: operand lets users search for images with a specific ISO value; focal: searches for photos with a specific focal value, although it did not work in our lab.
To change the order of the photos in the overview, you can simply drag and drop images to the required positions. To display extended information for an image, right-click the photo in question and select Properties in the context menu. If the image includes Exif data, Picasa will display it. The Timeline function gives users the ability to display images in an animated timeline. Clicking an album opens the slideshow, which you can start by clicking the slideshow icon in the main window.
Editing
Double-clicking an image in the overview switches Picasa to the full screen and editing view (Figure 4). To the left of the image, you will see various buttons and controls that let you change the brightness, correct color casting, and align the image. The Effects tab has a number of functions for artistic image manipulation, such as adding a color gradient or changing the color to sepia or black and white.
Picasa's editing features are fairly simple and are unlikely to satisfy more ambitious amateurs. For example, the brightness function only supports lightening, but not darkening the image. The contrast function is automated; manual correction is not supported.
Slide controls at the bottom of the screen let users scale the image. Alternatively, you can click the image and move the cursor to scale to 100 percent. Clicking the icon with the propeller to the right of the scaling settings displays a histogram next to the image metadata and displays the brightness and color distribution for the image.
To edit multiple images with the same settings, select the images and then select Image | Batch processing. You can select from a number of tools in the edit window, such as Contrast (automatic) or Sharpen. Another way to edit multiple images is to edit a reference image and then click on Edit | Copy all effects. Then select the images you want to edit in the same way, and select Edit | Apply all effects. Doings so applies the effects and image editing to all the other images.
When you edit an image, Picasa originally stores the settings and does not save them with the image. To apply the changes, you need to click Save changes in the thumbnail view. The software creates a copy of the image and moves the unchanged original to the Originals/ subdirectory, which Picasa does not index.
Transfer
Picasa not only works locally but has a number of options for sending files. If you want to publish your photos, Google offers a free account on Picasaweb [4]. To upload the images, just click the selected images and then click Web album in the bottom of the window (Figure 5). If you already have an account, you just need to select the resolution and the directory in which you would like to save the images on the web service.
If they need to upload images, bloggers will also appreciate some help from Picasa; however, Picasa only supports Google's own Blogspot [5] format. If you prefer to host the images on your own website, click Folder | Export as HTML page in the menu. The software then embeds the selected images and thumbnails in a web page.
To send an image to a photo lab, click the Prints button. The software then shows you a selection of service providers and lets you choose one.
Buy this article as PDF
(incl. VAT)