DIY project with the versatile Arduino board
Click and Dirty
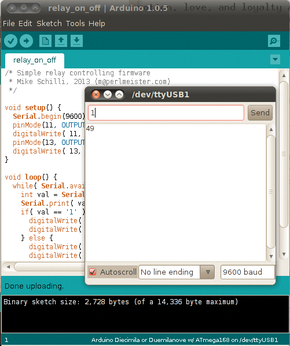
For quick testing of the firmware, you can use the Serial Monitor in the Tools menu of the IDE; it sends characters typed into the input field to the Arduino and displays the response from the firmware in the text window below. The sketch in Listing 1 uses Serial.print() to echo each character it receives back to the host. Figure 4 shows me sending the character 1 to the Arduino, which uses the Serial.print() firmware to return ASCII code 49. At the same time, the relay is energized and the LED lights up.
Still missing from the setup is a Perl script that attaches itself to the serial port of the controlling host and sends commands to the Arduino (Listing 2). It accepts either on or off on the command line. The information to be transmitted via the serial interface character is then translated to be either 1 or 0, which line 31 then sends to the port bound by the script, courtesy of the CPAN Device::SerialPort module.
Listing 2
relay
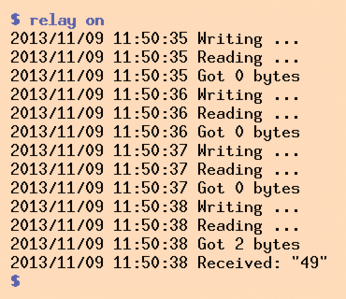
To verify that the Arduino has received the command and set the desired output pin, the script uses read() in line 35 to read the data returned by the firmware. If nothing arrives, the script uses redo to re-enter the loop and make a further attempt to write. As Figure 5 shows, a number of cycles may be necessary, especially if you have just plugged in the Arduino. The script uses Log4perl in $DEBUG mode; if you prefer something less chatty, modify line 6 to change the log level to $ERROR.
Fencing in the Mains Voltage
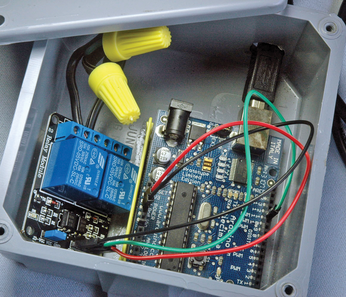
The relay switches 120 volts AC in the United States, so I wrapped the final version of my DIY project without the breadboard in a stable housing and clearly isolated the low-voltage board from the power cables (Figure 6). The relay board has stable screw terminals to connect the power cable to the relay.
People who use reverse polarity-protected plugs should switch the phase line with the relay, not the neutral. Software specialists who are not sure, or do not have enough experience in working with mains voltage, should call in a specialist instead of relying on luck in their experiments – Linux Pro does not want to see its readership decimated by ventricular fibrillation.
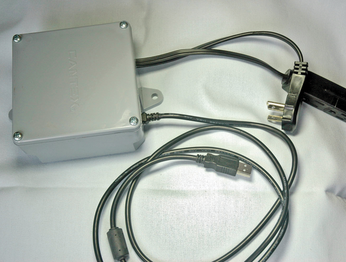
Figure 7 shows the US version of the USB switch with typical US-style 110-volt flat connectors. American electricians do not use European-style chocolate strip for connecting stranded wire; they pragmatically bolt on colored screw caps with internal metal thread, so-called "twist-on wire connectors" [6]. The robust housing from the hardware store is designed to weatherproof power cable wiring in the home and gives my hobby project a rustic and industrial touch.
A Great Empire for King Arduin
My switch setup is pretty low-end compared with the possibilities of Arduino technology. The number of DIY projects with the inexpensive board has grown enormously over the years and has given rise to a sympathetic ecosystem of inventors and component manufacturers.
If you are looking for details of Arduino programming, an excellent and detailed introduction is available in Jeremy Blum's Exploring Arduino book [7]. Incidentally, the name of the open source board is said to come from the field of catering: In the northern Italian town of Ivrea is the "Bar di Re Arduino" (Bar of King Arduin [8]), which is well known to the Arduino inventors.
Infos
- SainSmart 2-Channel Relay Module: http://www.amazon.com/gp/product/B0057OC6D8
- Firmata: http://firmata.org
- Listings for this article: ftp://ftp.linux-magazin.com/pub/listings/magazine/159
- Arduino IDE: http://arduino.cc
- Installation guide for Ubuntu: http://www.arduino.cc/playground/Linux/Ubuntu
- Twist-on wire connectors: http://en.wikipedia.org/wiki/Twist-on_wire_connector
- Blum, Jeremy. Exploring Arduino – Tools and Techniques for Engineering Wizardry. John Wiley & Sons, 2013.
- (Margrave) Arduin of Ivrea: http://en.wikipedia.org/wiki/Arduin_of_Ivrea
« Previous 1 2
Buy this article as PDF
(incl. VAT)
Buy Linux Magazine
US / Canada
UK / Australia