Termux for Android
Tiny Linux
Termux transforms an Android device into a lightweight and versatile Linux environment. This article introduces you to this must-have app.
Running a regular Linux distribution on an Android device is not a new idea, and several apps in the Google Play Store will let you deploy a full-blown distribution on an Android smartphone or tablet. If your device is powerful enough and storage space is not an issue, there's nothing wrong with this approach. In most cases, however, having a full-size Linux distribution crammed into an Android machine is overkill.
Enter Termux [1], an app that provides an alternative way to use popular Linux tools on an Android device. Combining a terminal emulator and a lightweight Linux environment in one tiny 157K app (Figure 1), Termux puts a wide range of Linux tools at your fingertips: from Bash, Emacs, and Git to cURL, rsync, and OpenSSH. The app requires no root privileges, and the dedicated Termux:API add-on gives you access to Android's APIs, so you control your Android device from the command line and shell scripts.
First Steps
Termux is available on Google Play Store and F-Droid [2], so you can install it from your preferred source. The app's default functionality can be extended by installing add-ons. The Termux:API add-on, for example, adds support for Android API, whereas the Termux:Styling package lets you pick an alternative color scheme and font. The Termux:Widget add-on gives you a home screen widget containing shortcuts to shell scripts, so you can run scripts in Termux with a single tap. You can install these add-ons for free from F-Droid. If you choose to install the add-ons from Google Play Store, you have to purchase them. Think of it as a way to donate to the project and support its developer.
Working in the terminal using the on-screen keyboard can quickly become tedious. Fortunately, Termux provides shortcuts to many common keyboard actions. Most of these shortcuts are identical to those in the Bash shell. For example, the Ctrl+A and Ctrl+E shortcuts move the cursor to the beginning and the end of the line, respectively, and the Ctrl+C and Ctrl+D shortcuts abort the current process and log out of the terminal session.
The only difference is that Termux uses the Volume Down hardware button instead of the Ctrl key. The Volume Up button in combination with various letters is used to emulate keyboard keys. The Volume Up+T shortcut emulates the Tab key, whereas Volume Up+W, Volume Up+A, Volume Up+S, and Volume Up+D act as arrow keys. The Using a touch keyboard page [3] provides a complete list of all supported shortcuts, and it's worth perusing before you start working in Termux (Figure 2).
There are three things you need to do when running Termux for the first time: Update the app's software repository, install the desired packages, and configure storage access. Termux uses the apt tool for package management, so if you are coming from Debian or Ubuntu, you should feel at home in Termux.
To update the repository, run the apt update
command. Want to see all packages in the repository? Run the apt list
command. To find a specific package, use the apt search PACKAGE
command, and to install the package, issue the apt install PACKAGE
command. Upgrading the installed packages is a matter of running the apt upgrade
command, and the app remove PACKAGE
command can be used to remove an installed package.
What packages to install depends entirely on what you want to use Termux for, but at the very least you might want to install the nano text editor, the rsync file-copying tool, and the OpenSSH connection tool. These three tools allow you to edit text and configuration files and perform backups as well as access and control remote machines. To install these packages in one go, use the following command:
apt install nano rsync openssh git curl wget
To configure storage access, run the termux-setup-storage
command. Doing this grants Termux permission to access shared storage on Android 6.0 and higher as well as create the dedicated storage
folder containing symbolic links to various storage locations. This includes ~/storage/shared
(the root folder shared by all apps), ~/storage/dcim
(the standard folder for photos and videos), and ~/storage/downloads
(the default folder for downloaded files).
Practical Uses
Having a tooled-up Linux environment on your Android device lets you perform tasks that usually require third-party commercial apps. For example, instead of using a specialized app, you can connect and control a remote Linux machine by running the ssh user@host
command (provided an SSH server is also installed on the remote host). And, using rsync, you can easily set up a robust solution for backing up data on your Android device to a remote machine.
To do this, it's a good idea to enable password-less SSH login, so you don't have to type the password every time you perform a backup. Start with running the ssh-keygen
command. Skip password creation when prompted by pressing Enter. Once a key pair has been created, run the ssh-copy-id -i .ssh/id_rsa.pub user@host
command (replace user
and host
with the username and the remote machine's IP address or domain name). This copies the public key to the remote machine, thus enabling passwordless login. Backing up data on your Android device to the remote server is a matter of using an appropriate rsync command. If you want to back up photos and videos, the following command will do the trick:
rsync -avz -e ssh ~/storage/dcim user@host:/path/to/backup/dir
Instead of running this command manually every time you need to perform a backup, you can write a simple Bash shell script, save it in the ~/.shortcuts
directory, and add a Termux widget that links to the script. This way, you can trigger a backup operation directly from the home screen.
Staying on the subject of photos, the jhead utility makes it possible to process photos stored on your Android device. Run the apt install jhead
command to install the utility in Termux. Using jhead, you can replace generic filenames with something more meaningful, like timestamps. The following command renames all .jpg photos using the yearmonthdate-hourminutesecond
rule (e.g., DC_0001.jpg becomes 20161010-152557.jpg):
for file in *.jpg; do jhead -n%Y%m%d-%H%M%S $file; done
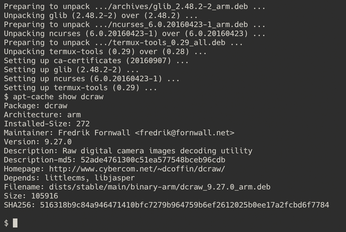
If you happen to shoot in RAW, you can convert RAW files into JPEG photos on your Android device using a combination of DCRaw, Netpbm, and ImageMagick. Install these tools by running apt install dcraw netpbm imagemagick
. Then, use the following command to convert a single RAW file to the PNG format:
dcraw -c foo.RAW | pnmtopng > foo.png
In this command, the dcraw
tool decodes the RAW file and pipes the output to the pnmtopng tool, which saves it in the PNG format. You can then use the convert tool to convert the resulting PNG file into JPEG:
convert foo.png foo.jpg
To process all RAW files and save them in the JPEG format, use the following commands:
for file in *.RAW ; do dcraw -c -g 2.4 12.92 "$file" | pnmtopng > "${file%%.*}".png ; done for file in *.png ; do convert "$file" "${file%.*}.jpg" ; done
Instead of convert, you can use the mogrify tool as follows:
mogrify -format jpg *.png
Keep in mind, though, that mogrify overwrites originals, so use it with care.
Want to apply effects to photos without resorting to a dedicated app? Termux and ImageMagick can handle that, too. The latter supports the Hald CLUT technology, which makes it possible to use special color lookup tables to perform color transformations.
To make use of Hald CLUT, you don't need to understand all its intricacies, but you need to do some preparatory work. Install ImageMagick on your regular Linux machine and run the convert hald:9 hald-9.png
command to generate a Hald CLUT table. Next, open the generated hald-9.png
file in a photo editing application, such as digiKam, apply the desired color corrections (curves, levels, saturation, brightness, etc.), and save the changes under a descriptive name (e.g., hald-9-vintage.png
).
Now you have a reference Hald CLUT table that can be used as a preset. Using this technique, you can create as many presets as needed. On your Android device, move them into the folder accessible by Termux. Use the following command:
convert foo.JPG hald-9-vintage.png -hald-clut foo-modified.jpeg
to apply the desired preset to a photo.
Using Termux:API
Although the Termux app gives you a lightweight yet functional Linux environment, the Termux:API add-on integrates it into the Android system by providing limited access to Android API. In practical terms, this means you can access and control Android hardware and system functions directly from within Termux, either directly from the command line or through shell scripts.
A simple Bash shell script in Listing 1 uses several Termux:API methods to take a photo and write an accompanying annotation to a CVS file. The script uses the jq
tool to extract geographical coordinates, so you need to install it first using the apt install jq
command.
Listing 1
Snap and Annotate
The script uses the termux-camera-photo
method to take a photo (note that this method takes a photo without any preview and feedback). The termux-location
method obtains location data, the jq
tool extracts latitude and longitude values, and the termux-dialog
method displays a dialog that lets you enter a brief description or comment. All the obtained data is then saved in the annotations.csv
text file. The termux-toast
method is used throughout the script to display pop-up notifications.
Termux:API offers a few other useful methods. The termux-sms-send
method lets you send SMS messages directly from Termux, and the termux-share
method can be used to share files using Android's sharing capabilities.
Buy this article as PDF
(incl. VAT)