Graphical tools for firewall configuration
Interplay
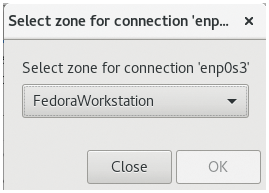
Out of the box, firewalld assigns one zone to each of the interfaces physically present in the system. However, a static zone definition is useless for mobile systems that often seek wireless access to the Internet from a wide variety of places. Therefore, you can assign a different zone to each interface at any time. To do this, select Options | Change Zones of Connections and set up a new connection zone (Figure 4).
Additionally, you can change the default zone for all interfaces in the system at any time by selecting one of the zones offered in the pop-up window in the Options | Change Default Zone menu. After clicking OK and authenticating as an admin, the firewall changes the default zone on the fly.
Panic Mode and Applet
The Options | Panic Mode setting blocks all connections so that firewalld does not forward any incoming or outgoing packets. An applet installed by the firewall-applet package also lets you control the application with a mouse click. The applet automatically sets up shop in the system tray after installation, displaying a red wall icon with a PC behind it. On mouse over, it shows the interface used, the default zone, and – if this has changed – the active zone. For WiFi connections, the applet displays the SSID (Figure 5).

Clicking on the applet lets you change the active zone. You can open a small window on the desktop in which to select a new zone without restarting. For the applet to display additional firewall messages (e.g., when zones change or the firewall reloads settings), some distributions also need to change the /etc/firewall/applet.conf configuration file. The value of the notifications and show-inactive options must be set to true.
In panic mode, the applet displays an appropriate icon so that you can see that the firewall blocks all packet transfers.
Logging
Contrary to the norm, the firewalld GUI supports virtually no logging functions, which restricts your options for retroactive packet analysis. You can activate logging of all rejected and discarded packets by selecting the Options | Change Log Denied entry in the configuration interface and then selecting all in the selection field.
Buy this article as PDF
(incl. VAT)
Buy Linux Magazine
US / Canada
UK / Australia