Create snapshots with Timeshift
Defining Filters
You have to think through your use of filters. Suppose you have selected the middle option (Include Hidden) for home under Users. Then Timeshift will only back up hidden files. However, you want to back up the /home/<User>/foo/ directory, apart from the bar/ subdirectory. Listing 1 shows the corresponding filter.
Listing 1
Fine-Tuning Home Directory Filters
/home/User/
- /home/User/foo/bar/
+ /home/User/foo/ *
Logically speaking, the exclusion line actually belongs at the end. However, this would not work, because filters act on subsequent filters, but do not affect them retroactively. If the exclusion of bar/ was at the end of the list, it would still be backed up, since the filter /home/<User>/foo/ * already includes it, and it cannot be excluded retroactively.
Simple Btrfs
When using Timeshift with Btrfs, the configuration is even easier, because the snapshots generally end up on the system partition. In addition, a snapshot always covers the entire system, except for Home.
In the tabs Type, Location, Schedule, and Users, there is very little to configure. Type and Schedule are identical to the rsync configuration tabs. As the Location, Timeshift specifies the system partition as the default. In Users, you can include the home directory, and you can enable quota support [7] in Btrfs groups.
If you are wondering what the Wizard menu item does in addition to Settings, you are not the only one. The only difference besides the Summary at the end is the absence of the Filters menu item. Thus, the wizard seems to be intended for users who do not want to set filters.
First Tests
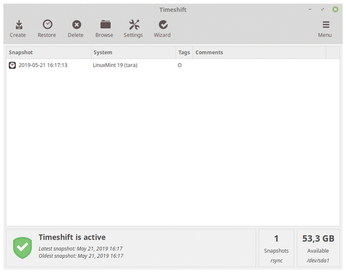
After completing the configuration, create an initial manual snapshot as a test in the main window. During the first few days, you will want to check whether Timeshift is working to your satisfaction (Figure 6).
You should also start the tool as root once only in the terminal; this shows you all the available options. For example, timeline --list tells you about the method used, the storage location, and the individual snapshots. You should be familiar with this function if you need to perform a restore later without a graphical user interface.
« Previous 1 2 3 4 Next »
Buy this article as PDF
(incl. VAT)
Buy Linux Magazine
US / Canada
UK / Australia