Synchronize and back up data with FreeFileSync
Profiled
Since a detailed configuration of the software can take some time, especially for extensive synchronization tasks, the software offers you the possibility to save your changes in a profile. Doing so permanently saves not only the respective options for data comparison and synchronization but also the source and target paths.
After completing the settings, click on the disk button in the upper left corner of the main window and enter a meaningful name for the profile in the corresponding dialog. You also need to select the storage path for the profile here. After doing so, FreeFileSync saves the profile at your chosen location and displays it in the list view top left in the program window. This view can store any number of profiles, giving you the ability to choose the appropriate profile without further complex configuration – which is especially useful if you use multiple removable media as the source or destination drives.
Batch Operation
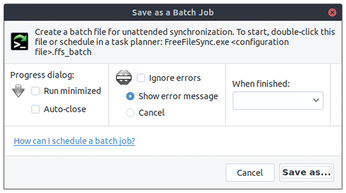
Batch files, which store the jobs to be executed, are also used to automate database syncs. They are based on the pre-configured profiles. The dialog for this can be opened by clicking on the right disk symbol top left in the program window.
In the window that now opens (Figure 4), enter the details of how FreeFileSync should execute the batch job and what should happen to the system on completion. You also specify here how the system should react in the event of an error. After saving the batch file, it can also be called by a cronjob if so desired.
Fully Automated
Especially in larger infrastructures with distributed storage capacities, permanent data synchronization makes perfect sense. With an automated routine, FreeFileSync can synchronize arbitrary directories and datasets. The developers have spun off this function into an independent program window named RealTimeSync, which also has its own launcher. This opens a small dialog in which you can activate any number of folders for permanent synchronization either by drag-and-drop or by typing in the paths (Figure 5).
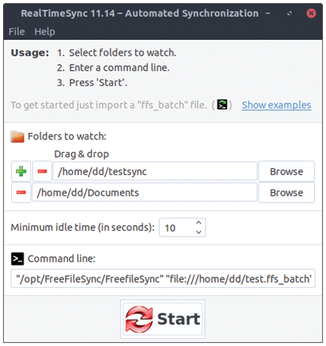
In a command-line bar, you first define the file to start the program including its path and point to a batch file you created up front that contains the functions for the sync. Pressing the Start button bottom center in the window creates a corresponding icon in the system tray. Clicking on it opens the dialog again. The routine now monitors the specified directories and automatically synchronizes when datasets change. In this way, you can keep the data up-to-date without having to do anything yourself.
« Previous 1 2 3 4 Next »
Buy this article as PDF
(incl. VAT)
Buy Linux Magazine
US / Canada
UK / Australia