Using XML code in PHP scripts with XHP

Intertwined

Article from Issue 157/2013
Author(s):

The PHP XHP extension lets you use HTML and XML tags directly in the PHP code.

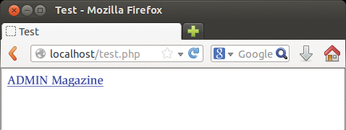
PHP scripts typically output HTML code that a browser then displays. Because many variables exist in the PHP code, the code itself can look kind of cryptic, as you can see in Listing 1. The code in Listing 1 dumps the contents of the $url variable in the <a> tag's href attribute, thus constructing a link to the ADMIN magazine website (Figure 1). The people who suffer most from this alphabet soup are template system developers who have difficulty identifying variables even in simple templates.
Listing 1

Simple Link in PHP


Figure 1: XHP generating a simple HTML link.

A PHP extension called XHP makes the code easier to read by letting you just add the HTML to the script and embed the PHP variables, as shown in Listing 2. XHP converts XML (and thus, HTML) blocks into valid PHP expressions. The resulting short notation reduces the error rate and helps programmers maintain an overview.

Listing 2

Simple Link with XHP


XHP primarily processes XML code and does not process certain lax HTML rules correctly. For example, echo <img src={$file}>; outputs an error because the tag is not closed correctly. The following would be correct: echo <img src={$file} />;. XHP also pays meticulous attention to correct start and end tags. <h1>Hello World!</h2> causes processing to stop. In general, you only see a blank page in this case. However, XHP adds missing quotes to attributes (e.g., the quotes for href in Listing 2).

Pitfalls

For Listing 2 to work, you need to integrate the init.php file included in the XHP source code tarball; in turn, it will pick up its dependencies: core.php and html.php. Ultimately, you are forced to provide all three files with your own web application. The XHP extension itself simply evaluates the XML syntax; the PHP files I just mentioned take care of everything else. This bunch of three resides either in the php-lib subdirectory in the source archive or directly on GitHub [1]. Listing 2 deliberately omits a document type definition. The following line would cause an error:

echo <!DOCTYPE html>;

This explains the special element x:doctype for HTML5 documents. If you encapsulate the content between <x:doctype> and </x:doctype>, XHP automatically adds the document type definition, <!DOCTYPE html>. Listing 3 gives an example (Figure 2).

Listing 3

HTML5 doctype


Figure 2: XHP replaces the x:doctype element with an HTML5 document type definition (see Listing 3).

You definitely need to pay attention to the final semicolon. It is easy to forget the semicolon when programming, especially if the HTML code covers several lines, as shown in Listing 3. The content inside the braces { } is interpreted by XHP as a complete PHP expression; it is not allowed to simply contain a variable (as in PHP). Thus, typing:

echo <p>{1+1}</p>;

outputs 2 in the browser.

Installation

The XHP installation process is designed for Linux systems; a .dll for Windows does not exist. XHP officially supports PHP versions 5.2 and 5.3, but it also ran under Debian 7 with PHP 5.4.

To install XHP on a plain vanilla Ubuntu 13.04 or Debian 7, be sure to install Apache, along with PHP 5 and its developer package first:

sudo apt-get install apache2 php5 php5-dev

To compile XHP, you also need GCC 4.0 together with G++ 4.0, Flex version 2.5.35 or later, Bison version 2.3 or later, and Re2c version 0.13.5 or later:

sudo apt-get install build-essential flex bison re2c

Now you can either download the source code [1] from GitHub by pressing the Zip button or clone the repository using git :

git clone git://github.com/facebook/xhp.git

Then, build XHP with the following three steps:

phpize
./configure
make

If you enter make test, you check the build.

To install the system, issue the command:

sudo make install

You need to enable the new extension in php.ini. On Debian and Ubuntu, the configuration file is located in /etc/php5/apache2. Add the following line:

extension=xhp.so

Depending on your installation, you might need to add the full path for xhp.so, as stated in sudo make install output. After you restart the web server by issuing sudo /etc/init.d/apache2 restart, Listing 2 should work. On Ubuntu and Debian, you need the listing in the /var/www directory; you can save it as test.php, for example. You also need to dump the PHP file from the php-lib subdirectory in the XHP source code archive into /var/www before you can view the results in a browser on http://localhost/test.php. Alternatively, you can check the results at the command line with the following (see Figure 3):

php -r 'echo "XHP!\n"; exit; <a />;'.

Debian and Ubuntu assign the command-line interpreter for PHP a separate php.ini, which resides in the /etc/php5/cli subdirectory. Enter XHP from this /etc/php5/cli subdirectory; otherwise, the call will fail.

Figure 3: If the extension is working properly and is registered for the command-line interpreter in the php.ini file, this message should appear.

Escape Characters

In Listing 4, a user could easily type in HTML code in the box and then inject this code into the page. However XHP automatically defuses XML and HTML code (escaping) with matching characters or entities. If the user types angle brackets <<, as shown in Figure 4, XHP creates the entity &lt; from it. In pure PHP, you would use the htmlspecialchars() function for this [2] as in the following:

Listing 4

Escaping Example


Figure 4: The HTML tags entered here end up as text in the output (see Listing 4).

echo '<p>Your input: '.htmlspecialchars($_POST['input']).'</p>';

which is, in fact, equivalent to line 4 in Listing 4.

Objectively Attached

XHP uses an extremely sophisticated approach under the hood. It does not just stubbornly output all the tags that follow echo but creates a separate PHP object for each XML or HTML element. For example, the statement

$list = <ul />;

is not followed by the <ul /> but by an object representing the HTML list. All objects created in this way by XHP automatically have an appendChild() method to make it easier to add more child elements. Listing 5 shows an example: It first creates an empty, unnumbered list <ul />. Then, it iterates through the elements of the $number array and generates a new value for each list entry <li></li>. The result is shown in Figure 5. XHP ignores all whitespace; spaces are between the individual elements. Thus, XHP converts this:

<p>Hello World</p>

to Hello World .

Listing 5

Using appendChild()


Figure 5: appendChild() has created more li elements (see Listing 5).

Buy this article as PDF

Express-Checkout as PDF
Price $2.95
(incl. VAT)

Buy Linux Magazine

SINGLE ISSUES
 
SUBSCRIPTIONS
 
TABLET & SMARTPHONE APPS
Get it on Google Play

US / Canada

Get it on Google Play

UK / Australia

Related content

  • Cascading Style Sheets

    Cascading Style Sheets (CSS) help you polish up your websites without taking a crash course in programming.

  • CSS Tricks

    Cascading Style Sheets (CSS) can do much more than define the color and font of your web text. We'll show you how to build the power of CSS into your web creations.

  • Hidden Meaning: Working with Microformats

    Programs aren’t as smart as humans when it comes to interpreting the meaning of web information. If you want to maximize your search rank, you might want to dress up your HTML documents with microformats and microdata.

  • Mindmapping

    View Your Mind lets you draw and manage mind maps that can help you structure your thoughts and ideas and record notes.

  • Perl: AJAX

    AJAX technology adds dynamic elements to enhance sluggish websites. All it takes is a server-side Perl program and some client-side JavaScript code.

comments powered by Disqus
Subscribe to our Linux Newsletters
Find Linux and Open Source Jobs
Subscribe to our ADMIN Newsletters

Support Our Work

Linux Magazine content is made possible with support from readers like you. Please consider contributing when you’ve found an article to be beneficial.

Learn More

News