Gimp image optimization with Python plugins
Photo Studio

© Lead Image courtesy of Mike Schilli
Performing the same Gimp image processing steps again and again is tiresome and error prone. Mike Schilli assigns this task to a Python script via a home grown new menu entry.
Today's cellphone cameras record images in giant formats that are hardly suitable for blogging or sending through narrow data pipes. I tend to scale all of these photos down to 2000x1000 pixels, maybe sharpen them a bit, and perform white balancing on each one. The Gimp image editor has been my tool of choice for many years, but it would be nice if it would help me out by performing these repetitive steps automatically.
In One Fell Swoop
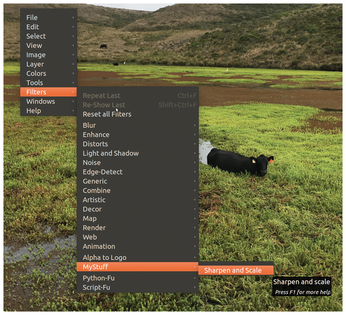
Fortunately, Python DIY scripts can be easily integrated into Gimp. The Ubuntu installation of the gimp package already contains all the ingredients for homemade commands. Listing 1 [1] initializes a new custom plugin for scaling and sharpening a photo. Saved in the ~/.gimp-2.8/plug-ins/ directory with execution rights, Gimp finds the file on startup and adds its new menu entry as requested under Filters | MyStuff | Sharpen and Scale (Figure 1). The entry is then displayed both in Gimp's context and drop-down menus.
[...]
Buy this article as PDF
(incl. VAT)