Getting started with the Ender 5 Pro 3D printer
Get Printing
Just unpack and get started? It's not so easy with hobby 3D printing.
Whether it's decorative elements for a new case-modding project, custom trees to add a flourish to the Gloomhaven board game, or homemade gears for quirky gadgets, 3D printers make craft projects much easier – or so I thought. I had been struggling with my conscience for a long time about buying a 3D printer and weighing the arguments. Do I really need this? Isn't there a lot of work involved? Could I maybe invest the money in a better way?
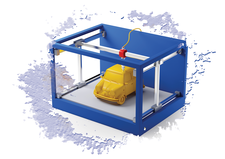
Eventually, I gave in to my cravings when Chinese manufacturer Creality3D offered the Ender 5 Pro [1] for just EUR350 (~$414). Two weeks later, the package reached my home. After I unpacked, one of my first fears disappeared. I thought the DIY assembly would be complicated, but it was actually relatively easy (Figure 1). However, I soon discovered that the initial assembly was only the beginning of my quest. Of course, this story is only about one man and one 3D printer model, but many of the issues I faced are similar to problems you might see with other hobby printers. This article is intended as a practical case study on what it takes to get a 3D printer assembled and working in the real world.
Successful Build
The Ender 5 Pro arrives with some pre-assembled parts. You won't need to assemble the printing bed, the extruder, or the microcontroller (including the display). An easily understandable set of build instructions and the right tools for the bolting work are also included, and everything is packaged between soft foam pads.
[...]
Buy this article as PDF
(incl. VAT)