Use gestures to browse a document on your Raspberry Pi
Hands Free
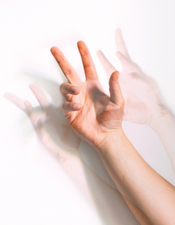
Have you found yourself following instructions on a device for repairing equipment or been half-way through a recipe, up to your elbows in grime or ingredients, then needed to turn or scroll down a page? Wouldn't you rather your Raspberry Pi do the honors?
This article is about the joy of tinkering, and the project I look at is suitable for all kinds of situations when your hands are full or just dirty. The hardware requirements turn out to be quite low: a Raspberry Pi, a screen, and a gesture sensor. My choice of sensor was the APDS9960 (Figure 1), for which you can get breakouts and an I2C connector for a low price at the usual dealers ($3.20-$7.50). However, you should note whether the sensor has soldered jumpers. The left jumper (PS) controls the power supply of the infrared lamp with the pin for positive supply voltage (VCC) and definitely needs to be closed. The right jumper (labelled 12C PU on the sensor in Figure 1) enables the pullups on the clock line (SCL) and the data line (SDA), which is superfluous on the Raspberry Pi; however, it doesn't hurt to have it.
Modern kitchens sometimes feature permanently installed screens. If you don't have one, go for a medium-sized TFT screen like the 7-inch Pi screen or a model by Waveshare (Figure 2). If you are currently facing the problem that the Raspberry Pi is difficult to get, as many people have, you can go for a laptop instead, which I talk about later in this article.
Installing the Software
The Pi Image Viewer program is implemented in Python and is very minimalist. In fact, it is an image viewer that performs precisely one function: scrolling through an image in response to gestures. The software would even work with a small four-inch screen with a Raspberry Pi clamped behind it, but it would not be particularly user friendly.
You can pick up the software for a gesture-driven recipe book on GitHub [1] by cloning the repository and installing the software with the commands
git clone https://github.com/bablokb/pi-image-viewer.git cd pi-image-viewer sudo tools/install
Additional information is provided in the installation instructions in the Readme.md
file.
Implementation
The implementation is built on Blinka [2] for the sensor and PyGame [3] for the interface. PyGame is a game engine, but it is also suitable for other applications. Moving objects is understandably as easy as pie (groan) for PyGame. Instead of moving sprites, the software shifts the image to show a different section each time (Figure 3).
In PyGame, rectangles stand in for both the screen window and the image. The window defines the global coordinate system, and its upper left corner marks the zero point; the (0,0) coordinate in turn determines the location relative to the screen. If the coordinates are (0,0), users will see the upper left part of the image (Figure 3, left).
If, on the other hand, the coordinates are negative, say (-50,-50), the top left corner is outside the window, and you see the bottom right area of the image (Figure 3, right). This arrangement might sound confusing at first, but moving the image toward the upper left (negative coordinates) makes the bottom right part of the image visible.
PyGame is controlled by events. The program processes key events for the four cursor keys (Listing 1, lines 12-17). Each key is backed up by a method that is responsible for moving in one of the four directions. To keep the code manageable, a key-value pair is defined up front for each direction (lines 2-8).
Listing 1
Keyboard Control
01 ... 02 self._MAP = { 03 K_RIGHT: self._right, 04 K_LEFT: self._left, 05 K_UP: self._up, 06 K_DOWN: self._down, 07 K_ESCAPE: self._close 08 } 09 ... 10 ** 11 ... 12 for event in pygame.event.get(): 13 if event.type == QUIT: 14 self._close() 15 elif event.type == KEYDOWN: 16 if event.key in self._MAP: 17 self._MAP[event.key]() 18 ...
Processing Gestures
Gesture processing is handled in a second thread that polls the sensor (Listing 2, line 4) and, from the detected gestures, simply synthesizes the matching key events for the PyGame main program (line 16), which closes the circle.
Listing 2
Gesture Control
01 evnt = {} 02 while not self._stop.is_set(): 03 time.sleep(0.1) 04 gesture = self._apds.gesture() 05 if not gesture: 06 continue 07 elif gesture == 0x01: 08 evnt['key'] = pygame.K_UP 09 elif gesture == 0x02: 10 evnt['key'] = pygame.K_DOWN 11 elif gesture == 0x03: 12 evnt['key'] = pygame.K_LEFT 13 elif gesture == 0x04: 14 evnt['key'] = pygame.K_RIGHT 15 ** 16 event = pygame.event.Event(pygame.KEYDOWN,evnt) 17 pygame.event.post(event)
The program shown here with the gesture control does not completely solve the problem. You still need to convert your printed recipe into a (JPG) image, but you can easily scan or take a photo of a recipe book or grab a screenshot to do that. Fairly low resolutions are absolutely fine for the purposes of this application.
If the recipe is a PDF, the following one-liner will help:
convert -density 150 in.pdf -append out.jpg
This command uses the convert
command from the ImageMagick package, which is typically already in place. If not, just grab it with your distribution's package manager. The -density
option lets you control the image resolution. If the PDF has multiple pages, the command arranges the pages one below the other. If you prefer horizontal scrolling, replace -append
with +append
. Two more parameters handle fine tuning: -trim
removes the white border, whereas -sharpen 0x1.0
sharpens the result.
You still need two things before you can start the image viewer with a double-click: a pi-image-viewer.desktop
file, which registers the image viewer as a program for processing JPGs, and a file that stores the image viewer as the default display program. Both points are described in the Readme file for the GitHub project.
Buy this article as PDF
(incl. VAT)