Run Samba in clustered mode with Ceph
Step 1: Get Ceph Ready for Action
The first step toward setting up Samba on a cluster is to determine the data storage solution; in this example, the solution is CephFS on a Ceph cluster (for alternatives, see the box entitled "Plan B for Ceph and Samba"). It is very good idea to use the current version of Ceph, which was Jewel 10.2.0 when I wrote this article, because the developers only guarantee stability as of this version of CephFS. In this example, I used Ubuntu 16.04; the Ceph project already has pre-built packages with the required Ceph version [1].
Plan B for Ceph and Samba
If you are looking for an alternative to the configuration described in this article, you can combine Ceph and Samba in other ways. For instance, Red Hat's developers have written a VFS module for Samba that is coupled directly to the RADOS library and can talk directly to the object store.
The advantages of this VFS solution are obvious: On one hand, the need for a local CephFS mount on the Samba server is removed. As a result, the deadlock problem mentioned previously in the context of releasing storage elegantly disappears. Additionally, it is no longer necessary to run metadata servers because you are not using CephFS.
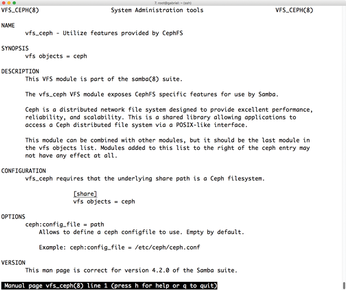
The VFS module for Samba is included in all versions of Samba from 4.2 (Figure 1). If you find a more recent package in your distribution, you can the opt for the vfs_ceph module. Look online for details of the drivers and the necessary configuration [2].

You can use ceph-deploy to set up the Ceph configuration. This tool prepares the three computers for Ceph, installs Ceph, and also lets the admin activate the disks in Ceph. The first step, then, is to install ceph-deploy. Although a package with the tool is included in Ubuntu, I recommend using the ceph-deploy version from the Red Hat repository (Figure 2). You need to enable the repository up front by typing

wget -q -O- 'https://download.ceph.com/keys/release.asc' | sudo apt-key add -
for the GPG key and then
sudo apt-add-repository 'deb http://download.ceph.com/debian-jewel/xenial main'
for the packages themselves. Then, install the tool on your system with:
apt-get update && apt-get install ceph-deploy
You only need to run these steps on one of the three systems.
Preparing the Servers for Ceph
For Ceph and ceph-deploy to work, you need a working SSH connection. On each host, you should also have a user named ceph who runs ceph-deploy. The user should also be able to use sudo without a password to run the commands on the systems as root. The following commands will do the trick:
echo "ceph ALL = (root) NOPASSWD:ALL" | sudo tee /etc/sudoers.d/ceph
sudo chmod 0440 /etc/sudoers.d/ceph
The ceph-deploy command uses SSH to execute commands within the cluster. To avoid the need for many passwords, the ceph user should be able to connect freely between the servers using SSH without a password.
The ssh-copy-id command copies the public part of an SSH key to a remote host. The default username should also be set to ceph in the ~/.ssh/config file on the other servers in the Ceph cluster, which will help you avoid ceph-deploy trying to log in as root.
The three computers and their IP addresses on all three hosts must be available in /etc/hosts. It makes sense to make one of the three nodes the master and use it for the ceph-deploy calls, although this has no effect on the functionality of Ceph.
Rolling Out the Ceph Cluster
Once ceph-deploy is ready to run, the other steps of the Ceph installation are almost automatic. The install command in ceph-deploy makes sure the necessary packages for Ceph exist on all specified hosts. The command
ceph-deploy install --release jewel alice bob charlie
run on the imaginary master host automatically installs Ceph on all three computers.
The cluster setup follows. Just as a reminder: Ceph consists of three components: Object Storage Devices (OSD), Monitoring Servers (MON), and Metadata Servers (MDS). The OSDs are the hard drives that the cluster requires. The MDSs extend the Ceph object store to include POSIX capabilities for use as a filesystem. The MONs are the most important components of Ceph: They monitor the quorum and ensure cluster operation.
When rolling out Ceph, the MONs are the first components you need to turn to. For installation in a new cluster, ceph-deploy has the new command. On the master server,
ceph-deploy new alice bob charlie
automatically rolls out a new Ceph cluster on the three hosts; At the end of the process, ceph-mon is running on each of the hosts. Once ceph-deploy has completed its work, the ceph -w command on the first of the three hosts will identify a working cluster.
The next step is to set up the disks: On Alice, Bob, and Charlie, /dev/sdb is intended for Ceph. The command
ceph-deploy create alice:sdb
(similar for Bob and Charlie) adds the disks to the cluster. If you want to outsource the OSD's internal journal to a fast solid-state drive (SSD), you can define the target partition by tagging :<partition> to the end of the command, as in
ceph-deploy create alice:sdb:/dev/sdf1
where /dev/sdf1 is a partition on a SSD.
Because CephFS will be used in the cluster, you'll need metadata servers. You install the metadata servers with the ceph-deploy command, as well:
ceph-deploy mds create alice bob charlie
Another call to ceph -w shows a new situation: Now you have a Ceph cluster with three MONs, three OSDs, and three MDSs, and it is ready for operation (Figure 3).
Incidentally, if you want to operate this cluster later on, you will need physical disks. The usual Ceph tips for redundancy and performance apply: You should have three individual servers, and if you want to out-source the OSD journals to fast SSDs, you will want to put more than four OSD journals on a single SSD. The throughput is a practical measure of a Ceph cluster's quality – a fast connection of each Ceph node certainly won't hurt.
« Previous 1 2 3 Next »
Buy this article as PDF
(incl. VAT)
Buy Linux Magazine
US / Canada
UK / Australia
Subscribe to our Linux Newsletters
Find Linux and Open Source Jobs
Subscribe to our ADMIN Newsletters
Support Our Work
Linux Magazine content is made possible with support from readers like you. Please consider contributing when you’ve found an article to be beneficial.

News
-
OSJH and LPI Release 2024 Open Source Pros Job Survey Results
See what open source professionals look for in a new role.
-
Proton 9.0-1 Released to Improve Gaming with Steam
The latest release of Proton 9 adds several improvements and fixes an issue that has been problematic for Linux users.
-
So Long Neofetch and Thanks for the Info
Today is a day that every Linux user who enjoys bragging about their system(s) will mourn, as Neofetch has come to an end.
-
Ubuntu 24.04 Comes with a “Flaw"
If you're thinking you might want to upgrade from your current Ubuntu release to the latest, there's something you might want to consider before doing so.
-
Canonical Releases Ubuntu 24.04
After a brief pause because of the XZ vulnerability, Ubuntu 24.04 is now available for install.
-
Linux Servers Targeted by Akira Ransomware
A group of bad actors who have already extorted $42 million have their sights set on the Linux platform.
-
TUXEDO Computers Unveils Linux Laptop Featuring AMD Ryzen CPU
This latest release is the first laptop to include the new CPU from Ryzen and Linux preinstalled.
-
XZ Gets the All-Clear
The back door xz vulnerability has been officially reverted for Fedora 40 and versions 38 and 39 were never affected.
-
Canonical Collaborates with Qualcomm on New Venture
This new joint effort is geared toward bringing Ubuntu and Ubuntu Core to Qualcomm-powered devices.
-
Kodi 21.0 Open-Source Entertainment Hub Released
After a year of development, the award-winning Kodi cross-platform, media center software is now available with many new additions and improvements.