Reenvisioning SSH with ShellHub
Starting Up
After running the command to bring up the resources listed in the ShellHub Docker Compose configuration, you'll see lots of Docker-esque output as containers are created and started. After putting the kettle on and coming back a few minutes later, you should be greeted with some logging information, right at the end of the output:
Creating shellhub-v002_emq_1... done
Creating shellhub-v002_ssh_1... done
Creating shellhub-v002_ws_1... done
Creating shellhub-v002_gateway_1 ... done
To check whether the installation was successful, run the following command to see which containers are now running:
$ docker ps
The seven containers that run a ShellHub server are shown in Figure 2. They include a MongoDB container and containers running from images with names such as:
shellhubio/shellhub-gateway:v0.0.4
shellhubio/shellhub-ws:v0.0.4
shellhubio/shellhub-ssh:v0.0.4
shellhubio/shellhub-ui:v0.0.4
shellhubio/shellhub-api:v0.0.4

The next step is adding a user to our shiny, new ShellHub server. From the same directory as in the cloned GitHub repository, run the following command:
$ ./bin/add-user chrisbinnie nothingtoseehere
User added: chrisbinnie
Tenant ID: fca338ad-8801-4a91-8487-5de263dadbd2
The username in this case is chrisbinnie and the password is nothingtoseehere.
Connecting
The moment of truth has arrived. Open up a browser and navigate to the following HTTP page:
http://localhost/login
Figure 3 shows the slick-looking login screen that awaits.
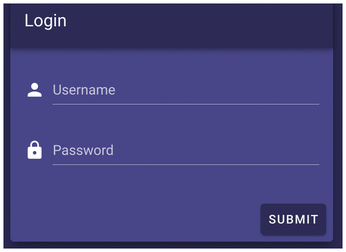
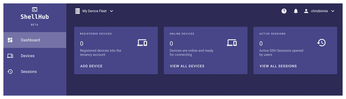
Figure 4 shows the main window that appears once you have logged in. On the left-hand side are a few options; the rest of the screen shows you the status of devices that are connected to your ShellHub server.
I'll cheat a little here in order to stay focused on the dashboard and the UI. Instead of installing a ShellHub agent (the equivalent of the SSH client) on another device, I'll install it on the ShellHub server itself and then explain what to do with other machines later on.
The process of installing a ShellHub agent is remarkably simple. Click the ADD DEVICE link on the dashboard, and you'll be presented with a curl command, as shown in Figure 5.

This command essentially passes a tenant ID to ShellHub and then asks the localhost (the ShellHub server name, which I'll change in a minute) to install the ShellHub agent so that it can be accessed over SSH.
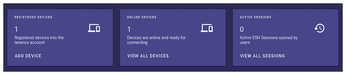
Then check the ShellHub dashboard again to see if the ShellHub agent has been registered. Figure 6 shows that a device is registered to the ShellHub server successfully.
Oh So Pretty
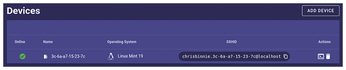
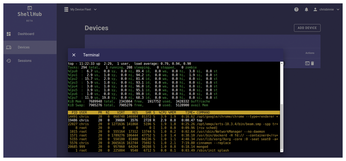
The View All Devices link in Figure 6 lets you open the Devices dialog (Figure 7). The command-line icon in lower-right corner of the Devices dialog lets you open an SSH prompt. As you can see in Figure 7, devices are referenced by MAC address, but you have the option of giving each device a handy nickname.
If you click the little shell prompt icon, you'll be prompted for a username and password. These credentials are for the machine's users directly and not the ShellHub server's usernames.
Figure 8 shows that the browser-based SSH client works well (I'm using Google Chrome on Linux Mint).
Note that the SSHID column in Figure 7 allows you to SSH directly over the command line to a machine connected to ShellHub. Simply click the copy box and then enter the credentials. See the project docs for more on connecting to another device [6] .
From the command line, the connections launched through the ShellHub GUI to devices on the LAN have the following format:
$ ssh <USER>@<SSHID>
For example:
$ ssh linux-user.3c-6a-a7-15-23-7c@localhost
With a little trial and error, you should be able to quickly get used to the format of the SSH command from all popular SSH clients. If you want to connect a device later on but aren't sure of the ID of that ShellHub's agent, the docs suggest running this command:
$ docker exec shellhub agent info
Then look for the sshid entry in the JSON that is output:
sshid: "namespace.device_name@address"
« Previous 1 2 3 Next »
Buy this article as PDF
(incl. VAT)
Buy Linux Magazine
US / Canada
UK / Australia
Subscribe to our Linux Newsletters
Find Linux and Open Source Jobs
Subscribe to our ADMIN Newsletters
Support Our Work
Linux Magazine content is made possible with support from readers like you. Please consider contributing when you’ve found an article to be beneficial.

News
-
Endless OS 6 has Arrived
After more than a year since the last update, the latest release of Endless OS is now available for general usage.
-
Fedora Asahi 40 Remix Available for Macs with Apple Silicon
If you've been anticipating KDE's Plasma 6 for your Apple Silicon-powered Mac, then you're in luck.
-
Red Hat Adds New Deployment Option for Enterprise Linux Platforms
Red Hat has re-imagined enterprise Linux for an AI future with Image Mode.
-
OSJH and LPI Release 2024 Open Source Pros Job Survey Results
See what open source professionals look for in a new role.
-
Proton 9.0-1 Released to Improve Gaming with Steam
The latest release of Proton 9 adds several improvements and fixes an issue that has been problematic for Linux users.
-
So Long Neofetch and Thanks for the Info
Today is a day that every Linux user who enjoys bragging about their system(s) will mourn, as Neofetch has come to an end.
-
Ubuntu 24.04 Comes with a “Flaw"
If you're thinking you might want to upgrade from your current Ubuntu release to the latest, there's something you might want to consider before doing so.
-
Canonical Releases Ubuntu 24.04
After a brief pause because of the XZ vulnerability, Ubuntu 24.04 is now available for install.
-
Linux Servers Targeted by Akira Ransomware
A group of bad actors who have already extorted $42 million have their sights set on the Linux platform.
-
TUXEDO Computers Unveils Linux Laptop Featuring AMD Ryzen CPU
This latest release is the first laptop to include the new CPU from Ryzen and Linux preinstalled.