Easy tools for archiving your datasets
File Roller
File Roller is the Gnome desktop environment's [5] graphical archiving front end. Installed along with Gnome, File Roller integrates seamlessly into the desktop. Operations are oriented on Gnome conventions; you will not find a conventional menubar. Instead, you can access the individual functions via buttons and a hamburger menu in the titlebar.
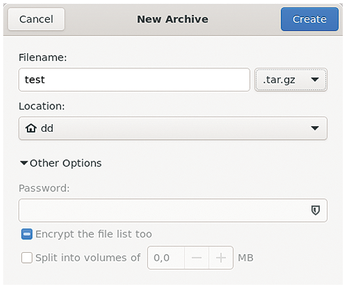
After starting, you can create a new archive or open an existing one with the New Archive or Open options in the hamburger menu. If you want to create a new archive, you need to enter the details in a small dialog. You can also define the archive format via a selection field. Depending on your choice of format, you can define a password for the archive, enable encryption of the file list, or split the archive into several parts under Other Options (Figure 7).
The two-section program window then appears. On the left, you will see the archive you created. The initially empty section on the right will display the files and directories you select to add to the archive. You can use the plus symbol in the titlebar to fill the archive with content. In the file browser that opens, your directories and mounted additional drives are displayed on the left. To the right, File Roller displays the tree structure of the directory. You can now check individual files and directories to add to the archive. After pressing the Add button, the file browser closes and File Roller adds the selected content to the archive. File Roller also compresses the content during this process (if the selected archive format supports this option), so populating the archive can take a while for larger datasets.
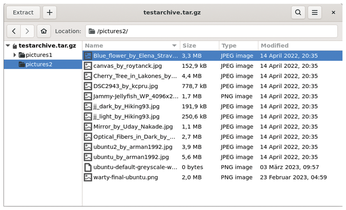
After completing the archiving process, the files and folders are displayed in a table in the right panel of the program window (Figure 8). Double-clicking opens the individual directories, while existing hierarchies with subdirectories simultaneously are displayed on the left side. The program backs up all the contents automatically. To open an existing archive in the empty main window, go to the hamburger menu and choose the Open option. You can then view the archive's contents in the main window.
After opening an archive, you can unpack single files by right-clicking to select and then choosing Delete in the context menu. To add files to the archive, press the plus button in the titlebar and use the dialog. You can also define exclusion and inclusion criteria for the content.
If you only want to unpack individual files or directories from an archive, you can choose them individually by right-clicking and selecting Extract. File Roller then opens the file browser again and asks for a target path. Pressing the Extract button does what it says on the label. The program will display a success message and let you open the target directory in the file browser (Show the Files).
PeaZip
As a standalone archiver, PeaZip [6] does not rely on the Linux-specific packing programs. PeaZip targets professional users rather than casual users who just want to archive a few folders and files now and then.
PeaZip impresses with a conventional but brightly colored interface. Besides a horizontal buttonbar and menubar, you will also find a vertical navigation sidebar on the left. To the right is the main area of the window with the contents. Above it is another bar, where you can see the path of the current main directory and browse the folder structure using the arrow keys.
To create a new archive, select File | Create new archive in the menu. PeaZip switches to a dialog where you can specify basic information, such as the archive's name and format, as well as enable special features, such as splitting the archive or assigning a password for it. You can also drag and drop content into the free area using the desktop file browser. Files and directories to be added are shown, along with the path, file or directory size, and file formats. Like in Engrampa, icons show you the file types (Figure 9).
In the Output field, you then specify a name and storage path for the archive; the Type field lets you specify the format. In addition to the common archiving formats, PeaZip supports its native PEA [7] format. If you want to use the archive in an environment where different archiving programs are in use, a cross-platform format, such as ZIP or GZIP, is a good choice.
However, PeaZip does not fully support all archive formats. It can read and extract some formats, but not create them. In this case, the Function field is grayed. Depending on the selected archiving format, you can then make changes in the Level, Split, and Password | Keyfile fields. If no options are available for the selected format, the corresponding buttons will simply be grayed.
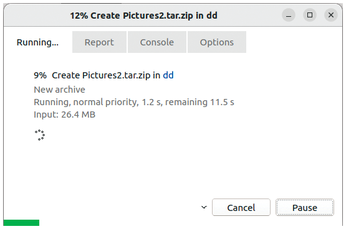
After pressing OK to confirm your choice of settings, PeaZip creates the archive and transfers the contents. While this is happening, you will see a small window with a progress bar and short status report (Figure 10). If everything goes smoothly, the status window closes at the end. If an error occurs, the progress bar will change from green to red. A Hints about the error link will then appear bottom left above the progress bar; clicking on this link displays detailed information in a separate window.
For existing archives, you need the File | Open archive dialog. You can find and open the archive you need in the file browser. After choosing an archive, you will find its contents in the main window. Clicking on individual folders in the list view lets you browse the directory tree and display files. To display files, PeaZip calls on various external programs to read a variety of standard formats.
In addition, PeaZip lets you unpack individual files and directories, as well as entire archives. To extract a single or multiple files, select them in the list view and open them by right-clicking to open the pop-up context menu. In the menu, select the Extract option and then select the Extract selected object(s) item from the submenu.
PeaZip switches to a configuration dialog where the files you wish to unpack are listed at the top. Beneath the list, you choose the output path and some name settings. If there is already some content with the same name in the target path, you can adjust the individual file names. PeaZip automatically creates any target directories that do not yet exist. If you confirm the configuration again by pressing OK, PeaZip goes about its work, showing you the progress in a status window, which automatically closes on completion. Back in the main window, you can now access the unzipped files using a file browser without any restrictions.
To extract a complete archive after opening, select Extract in the buttonbar. PeaZip now takes you to a dialog where you define the target path and some other options, such as the behavior of the unpacker if files of the same name already exist. In addition, you can remove the original archive by checking the Delete archives after extraction option. If you specify a folder that does not yet exist as the target path, PeaZip automatically creates it.
After completing the configuration, press OK to confirm.
PeaZip provides several special functions that significantly simplify the management of large archive collections. You can easily convert individual archives to a different format. As the first step, highlight the archive and select Convert in the main window. During this step, you can assign a new name in a dialog, if needed, and set the desired format in the Type field.
After pressing OK, PeaZip converts the archive and shows you the progress. Conversion can take a while for larger archives because the application first unpacks the source archive and then creates it again in the target format in a second step. If an error occurs during conversion, the routine stops and displays a message in the status window.
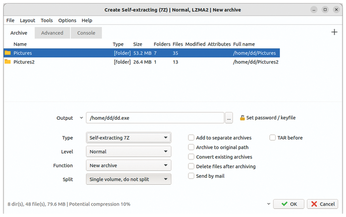
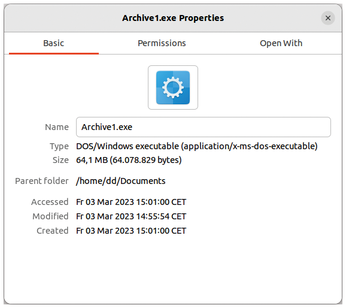
Self-extracting formats are useful for making archives available on computers that do not have an archiving tool installed. PeaZip creates these archives with an .exe file extension. They can be opened on DOS and Windows, but not on Linux. In IT infrastructures with many different operating systems, the recommended approach is to instead use an archive format with cross-platform support, such as ZIP, instead of a self-extracting format (Figure 11).
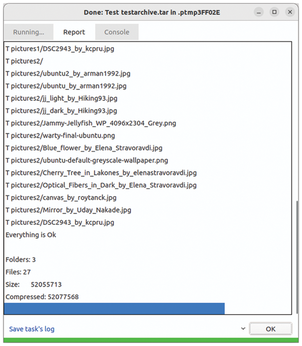
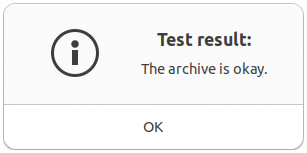
Additionally, you can use PeaZip to check the integrity of an archive (Figure 12). To do this, first select the archive in the main window and then click on the small open triangle top right next to the Test button. In the context menu, call one of the offered check routines. Repair routines are also available for ARC archives.
The List and List (with details) options show the file contents of the archive in a separate window, with compression methods and further attributes for the individual files in the detailed view. The simple list view, on the other hand, only gives you a table with the existing files.
PeaZip also has a feature to help you find duplicates in archives. Select File manager | Find duplicates in the selection menu that opens and click on Suggest Possible Duplicates in the drop-down menu. PeaZip shows you the suspected duplicates in a separate window.
You can also use PeaZip to securely delete content; whether or not it is packaged in an archive is irrelevant. The software also supports secure deletion of folders and hidden files. Secure delete has three modes: Quick Delete does not physically delete the data but simply removes the entries from the file allocation table. Zero Delete overwrites the marked files with zeros, and Safe Delete overwrites the contents with randomly generated combinations of numbers and digits.
To delete content, first select the desired files and folders in the main window's file view. Then click on the small open triangle top right next to the Secure delete button. In the selection menu that now opens, click on Quick Delete, Zero Delete, or Safe Delete depending on your preferences. After you confirm the prompt, PeaZip displays the progress in a separate window. After completing the deletion process, PeaZip jumps back to the main window and updates the file view at the same time.
Xarchiver
Xarchiver [8] has long been known as the standard graphical front end for archive management on Xfce. The project has detached itself somewhat from Xfce and is also considered the tool of choice on LXDE. Instead of a standalone archiving program, Xarchiver is a graphical user interface for the command-line tools commonly used for archiving content on Linux. The conventional main window is composed of a small buttonbar and menubar and two large segments in which Xarchiver displays the directory tree and the contents of the individual folders.
When you start Xarchiver, only the two buttons on the left, for creating a new archive and opening an existing one, are active. The Create a new archive option takes you to a separate dialog, where you enter the name and target path. You define the format in the Archive type field. After you press Create, the window closes and Xarchiver creates the archive. You can then add content in the main window. To add content, click on the third button from the right in the buttonbar. In the file browser, select the desired files and add them to the archive by pressing Add.
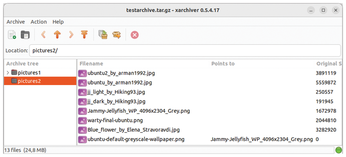
By default, Xarchiver backs up the files without retaining the source paths. If you want to include the paths, select the Save with full path option. The contents then end up in the main window, where Xarchiver lists them in a table, including some statistical information, such as the file size, path, permissions, date, timestamps, owner, and group (Figure 13).
You can double-click on a folder in the archive to view its contents in the table. In the left pane, you can also trace the archive's folder structure using the subfolders in a tree view. Xarchiver immediately adds the contents to the archive; manual saving is not necessary. You can also open an existing archive in the main window. After selecting the desired archive in the file browser, its contents appear in the main window.
Xarchiver offers two dialogs for extracting a complete archive or individual content from it. To extract individual files or folders from an archive, right-click on the desired archive or highlight the files with a single click. Then select Extract from the context menu, and a dialog will prompt you for the target path. Then press the Extract button again; Xarchiver will now extract the content to the desired location.
For a complete archive, first open the archive, and then select Extract files in the buttonbar. The software will now open a dialog where you can specify the target path and some options. When you then click Extract, Xarchiver will decompress the contents in the target directory and keep the existing folder structure. At the same time it creates a root folder with the archive's name, which allows you to store multiple archives in the same target directory without accidentally overwriting files or directories of the same name.
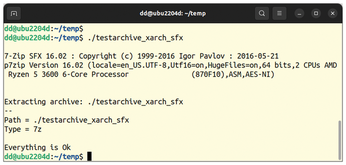
If supported by the archive format, Xarchiver also generates self-extracting archives. With an archive open, click Action in the menubar and select the Make SFX option in the context menu. In the file browser, type a name for the self-extracting archive, select the target path, and click Save. Xarchiver now creates the desired archive with execute permissions. On other Linux machines, you can open the archive by double-clicking in the file browser or simply by calling the archive file at the command line (Figure 14).
During unpacking, the routine displays a number of status messages. If there are already files or directories of the same name in the target directory, Xarchiver interrupts the unpacking process and waits for input on how to handle the duplicate content. This routine does not let you specify target directories, however. Xarchiver always extracts the contents of the archive in the folder where the self-extracting archive file is located. When storing the archive file, you need to pay attention to the target directory and remember that the self-extracting archive can no longer be modified by typical archiving programs.
Xarchiver supports integrity checking for some archive formats. First open the archive and then enable the check routine by selecting Archive | Test. Further settings are not possible. The routine automatically checks the archive and outputs a message on completion (Figure 15).
« Previous 1 2 3 Next »
Buy this article as PDF
(incl. VAT)
Buy Linux Magazine
US / Canada
UK / Australia
Subscribe to our Linux Newsletters
Find Linux and Open Source Jobs
Subscribe to our ADMIN Newsletters
Support Our Work
Linux Magazine content is made possible with support from readers like you. Please consider contributing when you’ve found an article to be beneficial.

News
-
Gnome 47.1 Released with a Few Fixes
The latest release of the Gnome desktop is all about fixing a few nagging issues and not about bringing new features into the mix.
-
System76 Unveils an Ampere-Powered Thelio Desktop
If you're looking for a new desktop system for developing autonomous driving and software-defined vehicle solutions. System76 has you covered.
-
VirtualBox 7.1.4 Includes Initial Support for Linux kernel 6.12
The latest version of VirtualBox has arrived and it not only adds initial support for kernel 6.12 but another feature that will make using the virtual machine tool much easier.
-
New Slimbook EVO with Raw AMD Ryzen Power
If you're looking for serious power in a 14" ultrabook that is powered by Linux, Slimbook has just the thing for you.
-
The Gnome Foundation Struggling to Stay Afloat
The foundation behind the Gnome desktop environment is having to go through some serious belt-tightening due to continued financial problems.
-
Thousands of Linux Servers Infected with Stealth Malware Since 2021
Perfctl is capable of remaining undetected, which makes it dangerous and hard to mitigate.
-
Halcyon Creates Anti-Ransomware Protection for Linux
As more Linux systems are targeted by ransomware, Halcyon is stepping up its protection.
-
Valve and Arch Linux Announce Collaboration
Valve and Arch have come together for two projects that will have a serious impact on the Linux distribution.
-
Hacker Successfully Runs Linux on a CPU from the Early ‘70s
From the office of "Look what I can do," Dmitry Grinberg was able to get Linux running on a processor that was created in 1971.
-
OSI and LPI Form Strategic Alliance
With a goal of strengthening Linux and open source communities, this new alliance aims to nurture the growth of more highly skilled professionals.