Network knowledge at your fingertips with NetBox
Creating Services
You will now want to copy the default Gunicorn [16] configuration and create the services to turn NetBox on and off using the code in Listing 5.
Listing 5
Creating Services
01 $ sudo cp /opt/netbox/contrib/gunicorn.py /opt/netbox/gunicorn.py
02 $ sudo cp -v /opt/netbox/contrib/*.service /etc/systemd/system/
03 $ sudo systemctl daemon-reload
04 $ sudo systemctl start netbox netbox-rq
05 $ sudo systemctl enable netbox netbox-rq
06 $ systemctl status netbox.service
The code in Listing 5 copies the default Gunicorn config file and then creates the NetBox system service, starts it, enables it to run each time the system starts up, and checks to make sure that it is running properly and enabled to run on startup. After you complete this step, if you run the upgrade.sh command and it prompts you to restart the NetBox services, you now will be successful.
Web Server Setup
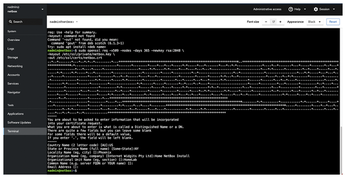
To set up the web server, you will want to create an SSL certificate to allow HTTPS encrypted traffic (Figure 7):
$ sudo openssl req -x509 -nodes -days 365 -newkey rsa:2048 -keyout /etc/ssl/private/netbox.key -out /etc/ssl/certs/netbox.crt
This certificate is self-signed, which is fine for our purposes here. For production use, you most likely will not want to use a self-signed certificate.
Next, you will be prompted for some optional details that you might want to include in the certificate. I suggest making a little game out of it to see if anyone actually reads your certificate details!
Now you will install the NGINX web server [17]:
$ sudo apt install -y nginx
The next step is critical: You must add your hostname and IP address from earlier to the server's configuration file:
$ sudo nano /opt/netbox/contrib/nginx.conf
Change netbox.example.com to the hostname or IP address that you entered previously in configuration.py. Note that you can have more than one entry here, such as the installation's IP address and hostname. Simply separate them with a space. You can use the $ ip address and $ hostname commands in the terminal to find out this information if you've forgotten.
Now you will copy the NetBox HTTPS config file to the NGINX directory, delete the default enabled site, replace it with a link to this one, and restart the HTTPS service by entering the commands in Listing 6 in order.
Listing 6
Setting Up the NGINX Server
01 $ sudo cp /opt/netbox/contrib/nginx.conf /etc/nginx/sites-available/netbox
02 $ sudo rm /etc/nginx/sites-enabled/default
03 $ sudo ln -s /etc/nginx/sites-available/netbox /etc/nginx/sites-enabled/netbox
04 $ sudo systemctl restart nginx
If you make any future changes to the config file, you need to recopy that file to the sites-available directory using the command in line 1 of Listing 6 and then by restarting NGINX using line 4. Failure to do so will result in your configuration not actually changing.
(There is an optional LDAP service installation section in the online NetBox documentation as well, but that is beyond the scope of this article.)
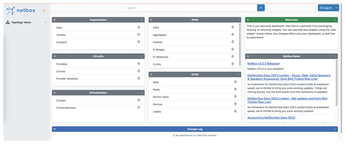
You should now be up and running (Figure 8). You can access your NetBox installation by going to your web browser and entering the hostname or IP address that you used in the NGINX configuration file and in configuration.py in the addressbar. You will log in with the username and password that you previously created. Upon login, I suggest creating a new user for yourself and whoever else needs access to NetBox.
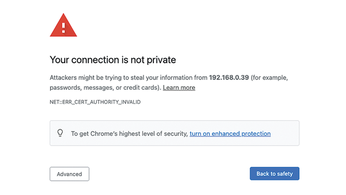
When you connect to your new NetBox instance using this SSL certificate, you will get a warning about connecting to an insecure server (Figure 9). For my installation that isn't a concern, but it might be for you. If that is the case, you can look into a certificate that is not self-signed. It is probably safe in this case to ignore that warning altogether for the purposes of this article.
Assigning User Rights
You can give users rights to view only or to edit. These rights are based on each individual subsection of each aspect of the network. This is quite granular, which is fantastic but also a bit confusing. I strongly suggest using groups smartly – think first about the best way to set permissions for your organization.
There is also an add-on for single sign-on (SSO), which might make sense for your installation. You may want one person to add all of the new devices and another person to add IP addresses to those devices. In that case, you would give the first person access to change device types and devices, but only to view IP addresses, and vice versa.
Some users may not need to see a particular section, so you can simply not give them that access. This is also useful if you have users from different sites or locations all connecting to your NetBox instance. In this instance, users may have the ability to only change items within their location or site as needed.
Permissions are a big deal and need to be well thought out. Remember, these are the keys to the kingdom. Even if that isn't really the case for your organization, it is probably a safe approach to NetBox.
« Previous 1 2 3 4 Next »
Buy this article as PDF
(incl. VAT)
Buy Linux Magazine
US / Canada
UK / Australia