Adding scripts and tools to SystemRescue
Including Custom Configuration Files
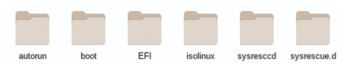
Unpacking the ISO image will give you the contents shown in Figure 1.
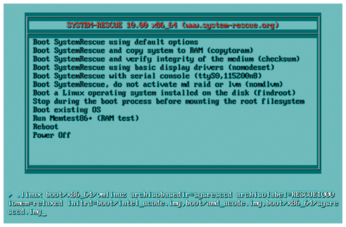
Customary of Live CDs, SystemRescue's behavior can be modified at boot by using cheat codes, which are keywords and flags passed at the boot prompt before the system is booted (Figure 2). See the SystemRescue website for some supported cheat codes [3].
Passing the cheat codes rootcryptpass and nofirewall enables SSH access upon boot (see the "Root Passwords in Configuration Files" box). You also need to pass loadsrm=y in order to load custom modules (which I will describe later). SystemRescue supports applying these options via YAML files (see Listing 1 for an example), which is much more elegant than hacking the bootloaders to bake them in. Save Listing 1 in the sysrescue.d folder of the image you just extracted. Beware, the YAML format is inflexible regarding indentation: Don't indent using the tab key; use the space bar instead.
Root Passwords in Configuration Files
SystemRescue lets you set root passwords via the rootpass cheat code. I don't recommend setting this code when using YAML configuration files, as shown in this article, because rootpass requires the password to reside in a cleartext YAML file, making the password readable by anybody who has access to the custom DVD.
The rootcryptpass code I use in this article is safer, because the password is stored in hashed form, just as the passwords in a regular Linux system are stored in /etc/shadow. To generate a suitable password hash (Figure 3), use the following command:
$ python3 -c 'import crypt; print(crypt.crypt("$password",crypt.mksalt(crypt.METHOD_SHA512)))'and replace $password with your chosen password string. The output of the command above may be used directly alongside the rootcryptpass cheat code as shown in the examples. Beware, the command will be saved to your shell's history if it is not disabled, and it will be visible in the system's list of running processes, which may reveal your password if you share the system with other users.
Listing 1
Applying Options via YAML Files
global:
  loadsrm: y
  nofirewall: true
  rootcryptpass: "$6$W9Lhg.3mr54J0mxe$4rudPwTGXLc9xgQotiE9HINide7NjO4lRzhZmsLOSwrrwXhSDr6BT2mhgfml0XvUfz6my8fULs.gm3u9THXVb0"
Modifying with cheat codes is not enough. SystemRescue, by default, creates a set of SSH keys every time it boots, and the keys are not preserved across reboots. If you want SystemRescue to use the same set of SSH keys every time, which lets you verify SystemRescue's fingerprints when connecting remotely, you need to pre-generate these keys and preload them. The ideal way to accomplish this is to create a SystemRescueModule (SRM), which is just a SquashFS filesystem that contains a set of files to be incorporated in your custom SystemRescue, similar to Tiny Core Linux extensions [4].
Generating a new set of keys is easy. On a different computer, boot SystemRescue with its default options. It will generate a set of SSH host keys under /etc/ssh at boot. You can use utilities included in SystemRescue to create an SRM that includes the SSH keys:
# mksquashfs /etc/ssh sshd_keys.srm -no-strip
This command will generate a module file called sshd_keys.srm, which you can transfer to the computer where you are doing the remaster. This file may be placed in the unpacked image's sysresccd directory. Keep in mind that this file's contents are sensitive; any evil entity that has access to these files could perform a man-in-the-middle (MITM) attack against your SSH sessions.
You can also use SRMs to include programs. Utilities for creating modules from Arch packages also exist. You can create a module including your desired programs by booting a clean SystemRescue DVD, installing the required applications using pacman, and then creating the SRM using cowpacman2srm:
# cowpacman2srm my_module.srm
The resulting SRM my_module.srm will include all the Arch packages you installed.
Putting Everything Together
Once you have placed your YAML configuration files under sysrescue.d and loaded your desired modules under sysresccd, you can create your custom ISO image with the command:
$ sysrescue-customize --rebuild --source=custom --dest=custom.iso
You can now burn this image to DVD using any of the usual tools.
Beyond Simple Modifications
SystemRescue features one advanced customization capability: the ability to download and execute scripts from the web upon boot. You can place a script on a web server, and a customized SystemRescue can be configured to download that script and execute it right after boot. Scripts may be fetched over HTTPS, and SystemRescue is capable of performing certificate validation for the TLS connection, so in theory the process is reasonably secure.
This groundbreaking feature allows SystemRescue to be used to provision services. You can create a custom SystemRescue image configured to download a script from a given URL and execute it. Then you can set a web server to deliver a different script depending on the IP from which the request is made. The end result is that you can use a SystemRescue DVD to boot a server, which will fetch the script and use it to download and install a set of packages and launch a set of services. However, if you boot the same image from a server assigned a different IP, it may be given a different script and end up downloading a different set of packages and executing a different set of services. This makes it possible to create a simple server provisioning system without effort. The only thing you need to take care of is configuring the network's DHCP server to assign the appropriate IP to each server.
Listing 2 shows a proof of concept web server written in Perl, based on an example provided by Perl's documentation [5]. It will return a Bash script if it receives a request from IP 192.168.3.50, and it will return a different one to queries made from any other address. Listing 3 displays an example script that creates an instantaneous FTP server which offers files stored in one of the machine's filesystems as anonymous downloads.
Listing 2
Simple Server Provisioning System
01 #!/usr/bin/perl
02 use IO::Socket qw(AF_INET AF_UNIX SOCK_STREAM SHUT_WR);
03
04 # Create a listening socket on all interfaces and port 8080
05 my $server = IO::Socket->new(
06   Domain => AF_INET,
07   Type => SOCK_STREAM,
08   Proto => 'tcp',
09   LocalHost => '0.0.0.0',
10   LocalPort => 8080,
11   ReusePort => 1,
12   Listen => 5,
13 ) or die "Can't open socket: $IO::Socket::errstr";
14
15 # Infinite loop that listens for requests and records the
16 # source IP from clients connecting to the server.
17 while (1) {
18   # Wait for connection
19   my $client = $server->accept();
20
21   # Obtain IP from the client.
22   my $client_address = $client->peerhost();
23
24   # If the IP is 192.168.3.50, read script_1.sh
25   # from the local filesystem and send it over.
26   # In any other case, return script_2.sh.
27
28   my $script;
29
30   if ( $client_address eq "192.168.3.50" ) {
31     $script = 'script_1.sh';
32   } else {
33     $script = 'script_2.sh';
34   }
35
36   open (INFILE, $script) || die "Couldn't open $script";
37   $client->send("HTTP/1.0 200 OK\r\n\r\n");
38   while (<INFILE>) {
39         $client->send($_);
40   }
41   close (INFILE);
42
43     # Notify the client of connection closure
44     $client->shutdown(SHUT_WR);
45 }
46
47 $server->close();
Listing 3
FTP Server Script
01 #!/bin/bash
02
03 # Mount a filesystem in the local machine
04 mount UUID=7bd471e8-cb11-474b-9901-e7ab6bfe2890 /srv/ftp
05
06 # Report an error and exit if the mount fails
07 if [ "$?" -ne "0" ]; then
08   echo "Could not mount on /srv/ftp"
09   exit 1
10 fi
11
12 # Run an ftp server in the background
13 systemctl enable ftpd.service
14 systemctl start ftpd.service
Listing 4 shows an example YAML configuration for SystemRescue to fetch a script from your web server and execute it at boot. Keep in mind that you may place as many YAML configuration files within SystemRescue's sysrescue.d as you like: They get loaded and read in canonical order, and all of their options applied. In case of conflicting options, the configuration of latter YAML files overwrites the ones from earlier files.
Listing 4
Fetching a Script to Execute at Boot
autorun:
  exec:
    200:
      url: "http://192.168.3.100:8080/"
« Previous 1 2 3 Next »
Buy this article as PDF
(incl. VAT)
Buy Linux Magazine
US / Canada
UK / Australia