ThinkUp
Keeping Watch: Keep Track of Your Social Media
ByCommunity managers, professional marketers, and active social media users want to know the effect their messages have on followers. ThinkUp can help.
Keeping track of what was said, the time of day it was said, and how the audience responded to it can be essential for marketers and community managers, and perhaps mildly interesting to the rest of us. ThinkUp is a free software platform that collects and culls data from your social media and keeps you informed of what’s going on, which messages your followers find interesting, and which are duds.
ThinkUp will tell you, for example, what your most popular posts are in a given period of time, allow you to keep track of whether you are speeding up or slowing down your posts, or advise you of the best moment to post by analyzing the time of day your users react to your tweets or Facebook updates. It does all this by tracking posts and responses across a broad range of social networks, including Twitter, Facebook, Google+, Foursquare, YouTube, and more.

Installation
ThinkUp is most likely not available in your distro’s repositories. That said, as a PHP application, it is not too hard to install (no configuring, linking, and compiling). As usual, I’ll be using a clean Debian install to start with the cleanest slate possible.
As usual, you first have to install Git
$ su
# apt-get update
# apt-get install git
to grab the latest version from the GitHub repo:
$ git clone https://github.com/ginatrapani/ThinkUp.git
Once downloaded, the first step of the installation consists of copying the contents of the ThinkUp/webapp/ directory to the location your web server expects it. In our lab, I use Debian and Apache, so I copied the file to /var/www/thinkup/:
# mkdir /var/www/thinkup
# cp -Rv ThinkUp/webapp/* /var/www/thinkup/
You are going to need a typical LAMP setup for things to work. Since I assume you are already using Linux and have installed Apache, you now have to install an instance of the MySQL database engine and the PHP module for Apache:
# apt-get install mysql-server mysql-common php5 php5-mysql
You will also want to install sendmail
# apt-get install sendmail sendmail-base sendmail-bin sendmail-cf sensible-mda rmail
because ThinkUp needs it later to send email to its users.
Configuration
If you now visit http://yourserver.com/thinkup, you should see something like Figure 2. ThinkUp has to have read/write access to all files and subdirectories under the thinkup/ directory, which means passing ownership over to the user that runs your server.

You can find out who owns the running instance(s) of your server with:
$ ps aux | grep [server]
For example, running Apache on Debian, you’ll get something like Listing 1.
Listing 1: Running Apache on Debian
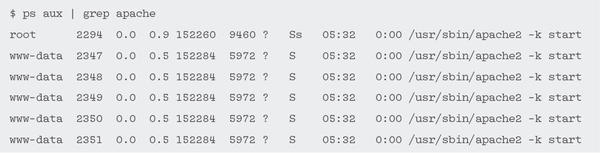
This tells you that the user you are looking for is www-data. To change ownership, it’s just a matter of using chown:
# chown -R www-data:www-data /var/www/thinkup/
Now, reloading the page will tell you that you have to install ThinkUp. Click on the Installing ThinkUp link to proceed.
In the next screen, ThinkUp tells you what packages you’re missing (Figure 3).

In this case, it’s the PHP5 library for the file transfer tool cURL and the PHP GD graphics library. On Debian, you install them with:
# apt-get install php5-curl php5-gd
Reloading again shows you the ThinkUp configuration screen (Figure 4). In the top half of the screen you set up the admin account and at the bottom, the database. Before you do that, though, you have to create an empty MySQL database and a MySQL user who has all the privileges for said database.

The easiest way is probably using PHPMySQLAdmin, installable with:
# apt-get install phpmyadmin
The Debian install process will also help you set up a root account correctly for MySQL, which is always a good idea. Once installed, visit http://yourserver.com/phpmyadmin, and log in and choose the Privileges tab. Now, click on Add new user and name it thinkup, then set the Server box to localhost and set a password.
Scrolling down and selecting the Create database with the same name and grant all privileges radio button creates the user and database you need all at once.
If you can only access your MySQL instance from the command line, you will have to create the thinkup database, then the thinkup user, and finally grant privileges in three separate steps, as shown in Listing 2.
Listing 2: Setting Up the Think Databases
$ mysql -u root -p
Enter password:
mysql> CREATE DATABASE thinkup;
mysql> CREATE USER 'thinkup'@'localhost' IDENTIFIED BY 'somepassword';
mysql> GRANT ALL PRIVILEGES ON thinkup.* TO 'thinkup'@'localhost';
Now you are ready to configure the database part of the ThinkUp configuration screen.
Use localhost in the Database host field, thinkup in the Database name and User name fields, and the password you set in the Password field. Hit Set It Up.
Here’s where sendmail comes in useful. If you have installed sendmail, ThinkUp will send you an email with an activation link you can click and use to log in. If you don’t get it, there’s something wrong with your sendmail installation. It is beyond the scope of this article to troubleshoot sendmail, but you will find your lost message, along with the activation link, in /var/mail/www-data – that is, if you are using Debian Wheezy – or a similar location.
Once activated (Figure 5) you can try to log in. I say try, because the current ThinkUp version seems to have an undocumented bug that, regardless of what you write in the login text boxes, always dumps you back at the login screen. Apparently this is solved “updating migrations on your dataset.”

To do this, enter the root directory of your ThinkUp setup. (If you have been following this article, that will be /var/www/thinkup.) Then, as root enter:
# cd install/cli/
# php upgrade.php --with-new-sql
You should now be able to log in to your ThinkUp site.
Getting ThinkUp is only the first step of the installation/configuration process. Now you have to hook up the site so it starts culling information from your social networks. Note that for everything to work, ThinkUp must be available from the web. If you are behind a firewall, you will have to open a tunnel to your site.
ThinkUp connects to your social networks via plugins. Click on the down-pointing arrow in the upper left-hand corner of the screen to drop down a short menu and select Settings (Figure 6).

ThinkUp was originally designed to cull information from Twitter, so I’ll configure that first by clicking on the Configure button next to the Twitter plugin (Figure 7). The Twitter setup is elementary: Click on the link, fill in the fields with ThinkUp’s suggestions, and get a Consumer key and a Consumer secret code so ThinkUp’s crawler can access your account data.

Unfortunately, Facebook is not so straightforward, but anything regarding Facebook rarely is straightforward. Although ThinkUp will guide you through setting up an app, be aware that the instructions contained in the wizard are a bit old, and Facebook has since changed the way it does things.
Whereas the first two steps (Go to the Facebook Developers Apps page and click the “Create New App” button and Fill in the following settings.) are correct, the Website with Facebook Login mentioned in step 3 is nowhere to be found.
If you have followed ThinkUp’s first two instruction, you should now be in your app’s Facebook dashboard where you can click Settings from the menu on the left (Figure 8). Fill in the Display Name (e.g., ThinkUp). You can leave Namespace empty, but you have to fill in your domain in the App Domains box. If you access ThinkUp by visiting http://yourserver.com/thinkup/, you would type yourserver.com here.

Include a Contact Email and then click the + Add Platform button below, choosing Website from the pop-up. Fill in the Site URL box in the Website section. Taking the example from the previous paragraph, here you would fill in the whole URL (i.e., http://yourserver.com/thinkup/). You can leave Mobile Site URL empty.
Now you can copy and paste Application ID and the App secret from the Facebook Apps page to the areas with the same names in your ThinkUp setup.
Initially, ThinkUp retrieves data from user feeds (click + Add a Facebook User), but, once a user has been set, you can add pages that that user manages and retrieve data from there also.
Google+
Again, configuring a Google+ account is slightly different from what ThinkUp describes, because Google’s App dashboard has changed recently. Instead of Services as advised by the ThinkUp instructions, once you have reached what is now called Google Developers Console, click on CREATE PROJECT and then on APIs and auth to get to the panel described by ThinkUp.
Switch on Google+ API and click on Credentials on the left to get the codes for ThinkUp.
If you want to grab geolocation info from the people that interact with you, you should also activate:
- Google Maps Coordinate API
- Google Maps Embed API
- Google Maps Engine API
- Google Maps Geolocation API
- Google Maps JavaScript API v3
- Google+ API
In theory, this works for all social networks, but although geolocating your users is a sexy option on paper, its usefulness is very limited. I guess for privacy reasons, most people do not fill in their geographic location, so there is usually insufficient data to get a representation of your followers’ locations.
Because Google+ is a relatively new social network, the ThinkUp developers have not gotten around to integrating G+ pages (which are newer still). For the moment, all you can poll are users.
Data Display
To download data from your social sites, you have to start the ThinkUp crawler, which you can do in one of three ways:
- Start the crawler manually by clicking the circular up and down arrows icon on the right of your toolbar at the top of the screen. ThinkUp will start the crawler for you if it isn’t running already.
- You can start the crawler by calling the ThinkUp RSS feed. Click on the down-pointing arrow in the upper left hand corner of the dashboard and select Settings. Choose Account from the menu on the left and scroll down until you see the RSS section. Subscribe to the Secret ThinkUp Update Feed and set the frequency you want to poll the feed. Every time you poll the feed, the crawler launches.
- Finally, you can make the crawler start regularly with a cron task. For example, using the following line in your crontab file, the crawler will launch every 30 minutes:
0,30 * * * * cd /path/to/thinkup/crawler/;export THINKUP_PASSWORD=yourpassword; /usr/bin/php crawl.php your@email.com
Where /path/to/thinkup/ is wherever you have installed your ThinkUp instance, yourpassword is the password you use to access your ThinkUp account, and your@email.com is the email address you use to access your account. Note that, as with all cron jobs, the code must be all on one line.
Bear in mind that the first time the crawler launches, depending on the volume of data you already have in your social networks, it will take quite a long time before it delivers the goods, maybe even hours. Then, the results might not be what you expect because, again, ThinkUp needs time to harvest enough data to make insights useful, sometimes up to weeks of data.
Visualizing Data
After the first crawl, insights are immediately available by clicking the ThinkUp logo in the top left of the screen. ThinkUp will inform you about your most popular posts, your most loyal fans, the rate you are posting at compared with prior weeks, and much more (Figure 9).

If an insight has an icon on the right of it’s title bar, you can click it and unfold a detailed description (often in the shape of a graph) that contextualizes the data.
By clicking on Old-School Dashboard at the bottom of the page, ThinkUp brings up its old interface (Figure 10), which contains charts, the number of retweets, and other data not available in the Insights interface. Presumably, this data will gradually be incorporated into the new interface in later versions.

Another way to access your data is to take it directly from the ThinkUp database. The encoded_locations, for example, contains all the locations ThinkUp has been able to find, along with longitude and latitude; the users table contains names and handles Twitter users you follow; and so on. Each field is described within the tables, so working out which column holds what and how to cross-reference between tables is pretty easy.
Once you have had ThinkUp running for about month or so, you will start to see things that make sense (Figure 11) and the insights will help you become more effective at delivering content. You will be able to determine how to focus a story for maximum effect, where your readers are located, and the level with which they engage. ThinkUp even helps you work out the best time of day to publish your news.

Conclusion
ThinkUp is an excellent way to keep track of your social networks and can be invaluable at helping work out what you’re doing right and where you’re failing when trying to reach a wider audience.
That said, ThinkUp has some serious rough edges, especially in the documentation department. Most of the manual is old and refers to things that very often are not true anymore or to document interfaces that changed way back. Often essential steps required to get things working are not mentioned at all and can only be found by digging deep into the project forums.
However, ThinkUp’s development is brisk and ongoing, it has an active community, and it is used in high-profile institutions and companies (see the “ThinkUp Membership” box). If you’re interested in the clout you have in social media, maybe you should use it, too.

Subscribe to our Linux Newsletters
Find Linux and Open Source Jobs
Subscribe to our ADMIN Newsletters
Support Our Work
Linux Magazine content is made possible with support from readers like you. Please consider contributing when you’ve found an article to be beneficial.

News
-
Linux Kernel 6.16 Reaches EOL
Linux kernel 6.16 has reached its end of life, which means you'll need to upgrade to the next stable release, Linux kernel 6.17.
-
Amazon Ditches Android for a Linux-Based OS
Amazon has migrated from Android to the Linux-based Vega OS for its Fire TV.
-
Cairo Dock 3.6 Now Available for More Compositors
If you're a fan of third-party desktop docks, then the latest release of Cairo Dock with Wayland support is for you.
-
System76 Unleashes Pop!_OS 24.04 Beta
System76's first beta of Pop!_OS 24.04 is an impressive feat.
-
Linux Kernel 6.17 is Available
Linus Torvalds has announced that the latest kernel has been released with plenty of core improvements and even more hardware support.
-
Kali Linux 2025.3 Released with New Hacking Tools
If you're a Kali Linux fan, you'll be glad to know that the third release of this famous pen-testing distribution is now available with updates for key components.
-
Zorin OS 18 Beta Available for Testing
The latest release from the team behind Zorin OS is ready for public testing, and it includes plenty of improvements to make it more powerful, user-friendly, and productive.
-
Fedora Linux 43 Beta Now Available for Testing
Fedora Linux 43 Beta ships with Gnome 49 and KDE Plasma 6.4 (and other goodies).
-
USB4 Maintainer Leaves Intel
Michael Jamet, one of the primary maintainers of USB4 and Thunderbolt drivers, has left Intel, leaving a gaping hole for the Linux community to deal with.
-
Budgie 10.9.3 Now Available
The latest version of this elegant and configurable Linux desktop aligns with changes in Gnome 49.