Mitigating SSH brute-force threats on Linux systems
Switching to SSH Key-Only Authentication
One of the most effective ways to block SSH brute-force attacks is to completely eliminate password-based logins. If the attacker cannot even attempt to guess a password, brute force becomes irrelevant. SSH key-based authentication is more secure, faster, and now considered best practice for any Internet-exposed Linux system.
SSH keys are based on public-key cryptography. Instead of typing a password to authenticate, users generate a key pair: a private key (which stays on their local device) and a public key (which is copied to the server). When logging in, the client proves it owns the private key, and the server checks it against the authorized public key. If they match, access is granted, with no password exchanged.
I'll walk through the process of setting this up on a typical Linux server. Start by generating SSH key pairs. On your local machine (the one you will use to log into the server), open a terminal and run the following command:
ssh-keygen -t ed25519 -C "your_email@example.com"
This generates an ed25519 key, which is faster and more secure than older RSA keys. You'll be prompted to choose a file path (you can accept the default ~/.ssh/id_ed25519) and to optionally set a passphrase for added protection. A passphrase protects the private key in case someone gains access to your local machine.
After generating the keys, you'll find two files in ~/.ssh/:
id_ed25519 (private key - keep this secret)
id_ed25519.pub (public key - safe to share)
Next, you'll copy the public key to the remote server. The easiest way is with the ssh-copy-id command:
ssh-copy-id -i ~/.ssh/id_ed25519.pub username@your_server_ip
Alternatively, if ssh-copy-id is unavailable, you can manually append the key to the server's ~/.ssh/authorized_keys file using
cat ~/.ssh/id_ed25519.pub | ssh user@server "mkdir -p ~/.ssh && cat >> ~/.ssh/authorized_keys && chmod 600 ~/.ssh/authorized_keys"
Once the public key is installed, you can now log into the server without a password:
ssh user@your_server_ip
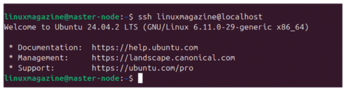
If everything is working, you'll be granted access without being asked for the account password (Figure 2); you'll only be asked for your local key passphrase (if you set one).
To stop attackers from trying passwords altogether, disable password logins in the SSH server config. On the remote server, open the SSH configuration file using your preferred editor:
sudo nano /etc/ssh/sshd_config
Look for the following lines and modify or uncomment them as shown:
PasswordAuthentication no
PermitRootLogin no
ChallengeResponseAuthentication no
UsePAM no
The PasswordAuthentication no directive disables interactive passwords. PermitRootLogin no disables direct root logins (which are often targeted by bots). UsePAM no disables Pluggable Authentication Modules (PAMs), which some brute-force tools use to bypass normal password checks.
After saving the file, restart the SSH service with
sudo systemctl restart sshd
At this point, SSH will reject all login attempts that don't use a valid SSH key. Even if an attacker has the correct username and tries 10,000 passwords, they will receive the same result: "Permission denied (publickey)".
Before restarting the SSH service, open a second terminal and verify that the key-based login works correctly. Keep your current session open as a fallback until you're confident everything is working. Also, consider setting up SSH key authentication for a secondary user account as a backup in case you misconfigure something on your main account.
While SSH keys are powerful, the system is only as secure as the private key. If an attacker gains access to your private key, they can impersonate you on any server where your public key is authorized.
To mitigate this:
- Always protect your private key with a passphrase during generation
- Never share your private key via email or cloud storage
- Use a secure password manager or encrypted storage for backups (see the box entitled "Using an SSH Agent for Convenience")
Using an SSH Agent for Convenience
Typing your passphrase repeatedly can be tiring. You can load your key into the SSH agent, which securely stores it in memory with:
evaluate "$(ssh-agent -s)"
ssh-add ~/.ssh/id_ed25519
Now your system will authenticate automatically for the rest of the session. Desktop environments like Gnome and KDE also include built-in SSH key agents that load keys on login.
If you suspect your key is compromised, remove its public key from ~/.ssh/authorized_keys on all servers and generate a new one.
Passwordless SSH authentication is one of the most powerful defenses against brute-force attacks. It completely eliminates the attacker's ability to guess credentials, shuts down botnet scanning efforts, and speeds up your login workflow.
By switching to SSH keys and disabling passwords, you immediately raise the bar for any potential attacker. This step alone blocks the vast majority of brute-force attempts and sets the stage for a more secure Linux server.
Dynamic Defense with Fail2ban
While SSH key-only authentication stops most brute-force attacks, many systems still rely on password access, especially in multi-user environments or when third-party services are involved. For these cases, Fail2ban [1] offers a powerful second layer of defense by actively detecting and blocking malicious login attempts in real time.
Fail2ban monitors logfiles for suspicious behavior (like repeated failed logins) and uses temporary firewall bans to block offending IPs. This not only slows down automated bots but it also discourages attackers who move on to easier targets after hitting a wall.
At its core, Fail2ban is a Python daemon that scans system logs using regular expressions (regexes). When a pattern of abuse is detected, such as five failed SSH logins in a short time, Fail2ban issues a ban, typically using iptables [2] or nftables [3] to block the attacker's IP for a set period.
The configuration is modular. Fail2ban uses jails, which are individual rule sets that define what log to watch, which regex filters to use, and what action to take when a violation occurs. For example, the SSH jail watches /var/log/auth.log or /var/log/secure and bans IPs that fail to authenticate too many times.
Fail2ban is available in most distro repositories. You can install it on Debian or Ubuntu systems with
sudo apt install fail2ban
On RHEL-based systems like Fedora or Rocky Linux, use
sudo dnf install fail2ban
After installation, enable and start the service as follows:
sudo systemctl enable fail2ban
sudo systemctl start fail2ban
By default, the SSH jail is enabled with safe defaults. However, it's always a good idea to fine-tune the settings.
Fail2ban's main configuration directory is /etc/fail2ban/. Instead of editing the core files directly, create an override file:
sudo cp /etc/fail2ban/jail.conf /etc/fail2ban/jail.local
Then, open jail.local in your preferred editor:
sudo nano /etc/fail2ban/jail.local
Scroll to the [sshd] section and ensure it looks like Listing 1 (see Table 1 for an explanation of the directives). If an IP fails to log in five times within 10 minutes, it is blocked for one hour.
Table 1
sshd Directives
|
|
Activates this jail |
|
|
The port SSH runs on (change if you've customized it) |
|
|
Logfile to monitor ( |
|
|
Number of failed attempts before ban |
|
|
Time window in seconds to count failures ( |
|
|
How long to block the IP ( |
Listing 1
sshd Jail Configuration
01 [sshd]
02 enabled = true
03 port = ssh
04 filter = sshd
05 logpath = /var/log/auth.log
06 maxretry = 5
07 findtime = 600
08 bantime = 3600
After configuring, restart Fail2ban to apply changes:
sudo systemctl restart fail2ban
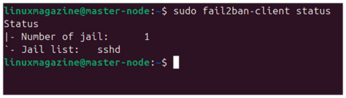
To see active jails, use
sudo fail2ban-client status
to display all active jails being monitored by Fail2ban (Figure 3).
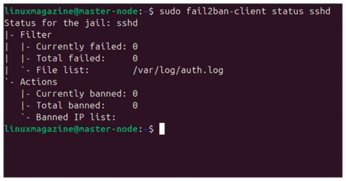
To view the status of the SSH jail,
sudo fail2ban-client status sshd
will show the number of currently banned IPs, along with the jail status. If someone attempts to brute force your server, Fail2ban will log the ban as shown in Figure 4.
To safely test Fail2ban, try intentionally entering the wrong password multiple times from a different system. After the fifth failed attempt (or whatever maxretry is set to), your IP should be banned.
You can manually unban an IP address with
sudo fail2ban-client set sshd unbanip 203.0.113.55
Replace the IP with the banned address. This is helpful if you accidentally lock yourself out or are testing from a trusted network. See the box entitled "Fail2ban Configuration Tips" for some advanced settings.
Fail2ban Configuration Tips
Some advanced options worth considering include:
ignoreip: Whitelists internal IPs that should never be banned (e.g.,ignoreip = 127.0.0.1 192.168.1.0/24)bantime.increment: Enables exponential ban durations for repeat offendersaction_<nftables>: Uses nftables instead of iptables if your distro supports it
To log all Fail2ban activity in real time, use
sudo tail -f /var/log/fail2ban.log
This file will show each detection, ban, unban, and restart activity, helping you troubleshoot or tune your system.
If you've changed your SSH port (e.g., from 22 to 2222), update the jail with
port = 2222
Fail2ban will then monitor that port correctly and continue blocking failed login attempts.
Fail2ban provides dynamic, real-time defense against brute-force attacks on SSH. Its integration with the system firewall makes it extremely effective at locking out bad actors after just a few failed attempts.
Combined with SSH key authentication, Fail2ban acts as a backup shield that significantly reduces the window of vulnerability. It's a must-have tool for any Internet-facing Linux server in 2025, especially those that cannot fully disable passwords.
Limiting Login Attempts with the Firewall
While tools like Fail2ban work reactively by watching logs, you can also proactively limit SSH connections using your system's firewall. Rate-limiting incoming SSH connections with iptables or Uncomplicated Firewall (ufw) [4] helps reduce the effectiveness of brute-force attempts by throttling login attempts before they reach sshd.
These techniques work best when combined with other layers like SSH key authentication and Fail2ban. Think of them as additional hurdles: The more you stack, the harder it becomes for attackers to succeed.
If your server uses iptables directly, you can apply connection limits using the recent module. This module tracks incoming connection attempts and allows you to block or throttle based on rules.
To limit connections to three attempts per minute per IP address, use the code in Listing 2. Here's how it works:
Listing 2
Rate-Limiting SSH with iptables
01 sudo iptables -A INPUT -p tcp --dport 22 -m state --state NEW -m recent --set
02 sudo iptables -A INPUT -p tcp --dport 22 -m state --state NEW -m recent --update --seconds 60 --hitcount 4 -j DROP
- The first rule tracks every new SSH connection attempt.
- The second rule drops connections from IPs that try more than three times within 60 seconds.
This simple limit can drastically reduce brute-force attempts without completely blocking legitimate users.
To make these rules permanent, save them using
sudo iptables-save > /etc/iptables/rules.v4
Or use your distro's iptables-persistent service.
If your server uses ufw, you can enable rate limiting with a single command:
sudo ufw limit ssh/tcp
This adds a rule that allows SSH connections but throttles repeated attempts from the same IP (Figure 5). Behind the scenes, it implements iptables rules similar to those shown above.
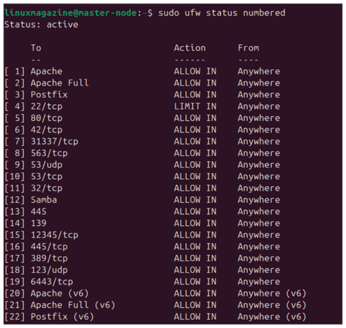
To verify, list your ufw rules with
sudo ufw status numbered
This protects against brute-force attempts without fully blocking users who mistype passwords occasionally.
« Previous 1 2 3 4 Next »
Buy this article as PDF
(incl. VAT)
Buy Linux Magazine
Subscribe to our Linux Newsletters
Find Linux and Open Source Jobs
Subscribe to our ADMIN Newsletters
Support Our Work
Linux Magazine content is made possible with support from readers like you. Please consider contributing when you’ve found an article to be beneficial.

News
-
Is AI Coming to Your Ubuntu Desktop?
According to the VP of Engineering at Canonical, AI could soon be added to the Ubuntu desktop distribution.
-
Framework Laptop 13 Pro Competes with the Best
Framework has released what might be considered the MacBook of Linux devices.
-
The Latest CachyOS Features Supercharged Kernel
The latest release of CachyOS brings with it an enhanced version of the latest Linux kernel.
-
Kernel 7.0 Is a Bit More Rusty
Linux kernel 7.0 has been released for general availability, with Rust finally getting its due.
-
France Says "Au Revoir" to Microsoft
In a move that should surprise no one, France announced plans to reduce its reliance on US technology, and Microsoft Windows is the first to get the boot.
-
CIQ Releases Compatibility Catalog for Rocky Linux
The company behind Rocky Linux is making an open catalog available to developers, hobbyists, and other contributors, so they can verify and publish compatibility with the CIQ lineup.
-
KDE Gets Some Resuscitation
KDE is bringing back two themes that vanished a few years ago, putting a bit more air under its wings.
-
Ubuntu 26.04 Beta Arrives with Some Surprises
Ubuntu 26.04 is almost here, but the beta version has been released, and it might surprise some people.
-
Ubuntu MATE Dev Leaving After 12 years
Martin Wimpress, the maintainer of Ubuntu MATE, is now searching for his successor. Are you the next in line?
-
Kali Linux Waxes Nostalgic with BackTrack Mode
For those who've used Kali Linux since its inception, the changes with the new release are sure to put a smile on your face.